Saturday, November 28, 2009

How to apply a custom Blogger Template

How to apply a custom Blogger Template

You have a Blogger account. You've tried all the built-in templates. You're not satisfied. You want something new, something unique. So you've searched Google and found a couple of nice templates. The problem is you don't know how to use a custom template. This tutorial will teach you step-by-step on how to apply a custom template.

Let's check first how our current blog looks like.


This blog has a plain design based on one of the built-in Blogger templates. However, we want something fancy and unique.

1. Our first task is to search for a custom template. Open Google and enter the keywords Blogger Template Adsense. Currently, a whopping 1,570,000 results were matched.


2. Check the first four results. I found this PassionDuo Green Template by eblogtemplates. It looks appropriate.


3. Download this template.

4. The template is in zip format. Extract the contents of the file. Nowadays, most computers have tools for extracting zip files.


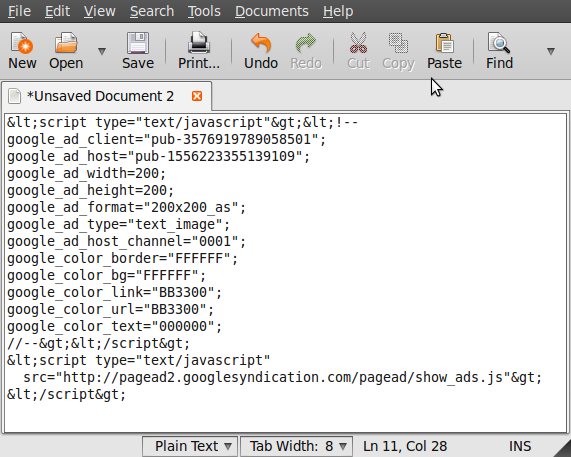
After the extraction, a new file will be created. Use Notepad or any text editor to view the contents of this file.


The file contains the source code of the template.


Copy the contents of the file.

5. Login to your Blogger account. Click on Layout.


Then click on Edit HTML to view your blog's template.


Make sure there's a check mark on Expand Widget Templates


6. Before you modify further your current template, save a backup first by clicking on the Download Full Template.


7. Remember in step 4 you've copied the source code of your custom template. Now it's time to paste the code in your blog's layout.


Click on Save Template to save the changes.

You may get a warning message about certain widgets will be deleted. Just click on Confirm & Save.


8. Reload your blog and verify that the custom template has been successfully applied.

I reloaded my blog and I've managed to change the template.


If you've followed carefully the steps I've provided, you should be able to use any custom template to improve the design of your blog. Have fun!
StumpleUpon DiggIt! Del.icio.us Blinklist Yahoo Furl Technorati Simpy Spurl Reddit Google I'm reading: How to apply a custom Blogger Template ~ Twitter FaceBook

Subscribe by reader Subscribe by email Share

Thursday, November 26, 2009

How to customize your Google ads placement and position them in a custom Blogger template.

How to customize your Google ads placement and position them in a custom Blogger template.

I assume you have a Google's AdSense account. You also have a Blogger account. You have a custom template where you can place a couple of Google ads. In this tutorial I will show you how to add a Google ad in a customized position.

Let's start with our template. Our template has a customized slot for a 200 x 200 ad. Right now, it doesn't have any ads yet.


And here's the layout.


The idea is to place our ad on the Custom Ad section.

1. Let's login to our Blogger account. My account's name is Lorem Ipsum.

2. Click on Layout.


3. Again, here is our blog's layout.


4. Click on Add a Gadget above the Followers gadget.

5. On the Add a Gadget window, select AdSense.


6. Let's choose a 200 x 200 ad.


7. Here's the updated layout. The AdSense gadget has been added.


Let's reload our blog. Take note the position of the ad. It's below the Blogger badge.


9. We need to extract our ad so that we can place it in a custom position. To do that we need to view our blog's source code. There are two ways to do that. You can right-click on your blog, the click on Page Source or Source. Or go to your toolbar and click on View and then click on Page Source or Source.


Here's the source code window.


Once you have the source code window open. Go and search for the keyword google_ad. You can also look for AdSense. Highlight all codes with the following format:


10. Open a text editor like Notepad for Windows or gedit for Ubuntu. Paste the previous code that we copied.


11. We need to replace two symbols from our code: < and >. First, search and replace all < with &lt;


Second, search and replace all > with &gt;


After replacing those symbols, here's our new code.


12. Let's go back to our dashboard. Click on Layout. Click on Edit HTML.


Here's our template again.


Make sure there's a check mark on the Expand Widget Templates.


We will be placing our ad in the Custom Ad section. So we search for that section. All custom templates have comments on their source code on where to put the ads.

13. Copy and paste the previous code we've replaced just right under the comments. Then click on Save Template


14. Let's reload our blog to see the changes.


Voila! The ad is now in the Custom Ad section. Notice it's above the Blogger badge. Let's check our layout again.


Definitely we have placed our ad in the correct spot.

I hope you find this tutorial helpful. If you have any comments, feel free to post them here.


StumpleUpon DiggIt! Del.icio.us Blinklist Yahoo Furl Technorati Simpy Spurl Reddit Google I'm reading: How to customize your Google ads placement and position them in a custom Blogger template. ~ Twitter FaceBook

Subscribe by reader Subscribe by email Share