Showing posts with label CRUD. Show all posts

Wednesday, February 8, 2012

Spring MVC 3.1 - Implement CRUD with Spring Data Redis (Part 1)

In this tutorial, we will create a simple CRUD application using Spring 3.1 and Redis. We will based this tutorial on a previous guide for MongoDB: Spring MVC 3.1 - Implement CRUD with Spring Data MongoDB. This means we will re-use our existing design and implement only the data layer to use Redis as our data store.


Dependencies

  • Spring core 3.1.0.RELEASE
  • Spring Data Redis 1.0.0.RC1
  • Redis (server) 2.4.7
  • See pom.xml for details

Github

To access the source code, please visit the project's Github repository (click here)

Functional Specs

Before we start, let's define our application's specs as follows:
  • A CRUD page for managing users
  • Use AJAX to avoid page refresh
  • Users have roles: either admin or regular (default)
  • Everyone can create new users and edit existing ones
  • When editing, users can only edit first name, last name, and role fields
  • A username is assumed to be unique

Here's our Use Case diagram:
[User]-(View)
[User]-(Add) 
[User]-(Edit) 
[User]-(Delete) 

Database

If you're new to Redis and coming from a SQL-background, please take some time to read the Redis Official Documentation. I would like to put emphasis on studying the Redis data types. See Data types and A fifteen minute introduction to Redis data types.

In its purest form, Redis is a key-value store that can support various data structures: Strings, Sets, Lists, Hashes, and Sorted Sets. Among these structures, we will pay extra attention to Hashes because we can use it to represent Java objects.

Hashes

Redis Hashes are maps between string fields and string values, so they are the perfect data type to represent objects (eg: A User with a number of fields like name, surname, age, and so forth):

Source: Data types

From Java to Redis

We have two Java classes representing our domain: User and Role. Here is the Class diagram:

# Cool UML Diagram
[User|id;firstName;lastName;username;password;role{bg:orange}]1--1> [Role|id;role{bg:green}]

However, Redis is a key-value store, and we can already see the model mismatch. How do we exactly map a Java class to a Redis structure? One of way of dealing with this is to use Hash structure.

Assume we have the following User object with the following properties:
User
----
id = 1
username = john
password = 12345678
role = 1

To map this object to Redis, via the command-line tool, as a Hash structure we use the command HMSET:
redis> HMSET user:1 id 1 username john password 12345678 role 1
"OK"

redis> HGETALL user:1
{"id":"1","username":"john","password":"12345678","role":"1"}

In this example, user:1 becomes the column name and the id (if we think of this in terms of a relational database). Notice we don't have to map a Role object because we've already set the value along with the user key.

Try Redis

If you need to experiment with an actual Redis instance online, visit the Try Redis.


Screenshots

Let's preview how the application will look like after it's finished. This is also a good way to clarify further the application's specs. Note: These are the same screenshots you will see from the Spring MVC 3.1 - Implement CRUD with Spring Data MongoDB guide.

The Activity diagram:

http://yuml.me/diagram/activity/(start)-%3E%3Cd1%3Eview-%3E(Show%20Records)-%3E%7Ca%7C-%3E(end),%20%3Cd1%3Eadd-%3E(Show%20Form)-%3E%7Ca%7C,%20%3Cd1%3Eedit-%3E%3Cd2%3Ehas%20selected-%3E(Show%20Form)-%3E%7Ca%7C,%20%3Cd2%3Eno%20record%20selected-%3E(Popup%20Alert)-%3E%7Ca%7C,%20%3Cd1%3Edelete-%3E%3Cd3%3Ehas%20selected-%3E(Delete%20Record)-%3E%7Ca%7C,%20%3Cd3%3Eno%20record%20selected-%3E(Popup%20Alert)-%3E%7Ca%7C.

Entry page
The entry page is the primary page that users will see. It contains a table showing user records and four buttons for adding, editing, deleting, and reloading data. All interactions will happen in this page.

Entry page

Edit existing record
When user clicks the Edit button, an Edit Record form shall appear after the table.

Edit record form

When a user submits the form, a success or failure alert should appear.

Success alert

When the operation is successful, the update record should reflect on the table.

Edited record appears on the table

Create new record
When a user clicks the New button, a Create New Record form shall appear after the table.

Create new record form

When a user submits the form, a success or failure alert should appear.

Success alert

When the operation is successful, the new record should appear on the table.

New record shows on the form

Delete record
When user clicks the Delete button, a success or failure alert should appear.

Success alert

Reload record
When user clicks the Reload button, the data on the table should be reloaded.

Errors
When user clicks the Edit or Delete button without selecting a record first, a "Select a record first!" alert should appear.

Error alert

Next

In the next section, we will study how to setup a Redis server both in Windows and Ubuntu. Click here to proceed.
StumpleUpon DiggIt! Del.icio.us Blinklist Yahoo Furl Technorati Simpy Spurl Reddit Google I'm reading: Spring MVC 3.1 - Implement CRUD with Spring Data Redis (Part 1) ~ Twitter FaceBook

Subscribe by reader Subscribe by email Share

Spring MVC 3.1 - Implement CRUD with Spring Data Redis (Part 2)

Review

In the previous section, we have laid down the functional specs of the application and studied how to map a Java object to a Redis data structure. In this section, we will study how to setup a Redis server both in Windows and Ubuntu.


Redis Setup

We will demonstrate first how to setup Redis in Windows 7, then on Ubuntu 10.04.

Windows 7

To setup a Redis server in Windows, follow these steps:

1. Open a browser and visit the Redis download section at http://redis.io/download

2. Choose the Win32/64 download. Notice it's status is Unofficial because the Redis project does not directly support win32/win64


3. Although Windows is not officially supported, there's a port available for it by Dušan Majkić. Under the Win32/64 section, click on the link A Native win32/win64 port created by Dušan Majkić.. It will bring you to a Github page.

4. Click on the Downloads section (upper-right) and you should see the following downloads.


5. Download the latest one (currently, it's 2.4.5).

6. Once the download is finished, extract the contents. Open the new folder and browse under the 32bit folder (choose 64bit if you have Windows 64bit version).


7. To run a Redis server, double-click the redis-server.exe


You should see the following console stating that Redis is now running:


To run a client interface, double-click the redis-cli.exe


And you should see the following console--waiting for your command:


Ubuntu 10.04

To setup a Redis server in Ubuntu, you will need to build it from the source. There are two ways:
  • Manual download
  • Terminal-based

Manual download

1. Open a browser and visit the Redis download section at http://redis.io/download

2. Download the latest and stable version (currently at 2.4.7).

3. Once the download is finished, extract the contents.

4. Now, let's build the source. Open a terminal and enter the following command:
/REDIS-DOWNLOAD-PATH/make


After building Redis, test it using the following command (make sure to replace REDIS-DOWNLOAD-PATH accordingly):
/REDIS-DOWNLOAD-PATH/make test


5. The binaries that are now compiled are available in the src directory. Run Redis with:
/REDIS-DOWNLOAD-PATH/src/redis-server


Terminal-based

1. Download, extract and compile Redis with:
$ wget http://redis.googlecode.com/files/redis-2.4.7.tar.gz
$ tar xzf redis-2.4.7.tar.gz
$ cd redis-2.4.7
$ make


2. The binaries that are now compiled are available in the src directory. Run Redis with:
$ src/redis-server


Note: These are the same steps you will see under the Download section at http://redis.io/download

Next

In the next section, we will discuss the project's structure and start writing the Java classes. Click here to proceed.
StumpleUpon DiggIt! Del.icio.us Blinklist Yahoo Furl Technorati Simpy Spurl Reddit Google I'm reading: Spring MVC 3.1 - Implement CRUD with Spring Data Redis (Part 2) ~ Twitter FaceBook

Subscribe by reader Subscribe by email Share

Spring MVC 3.1 - Implement CRUD with Spring Data Redis (Part 3)

Review

In the previous section, we have learned how to setup a Redis server in Windows and Ubuntu. In this section, we will discuss the project's structure and write the Java classes.


Project Structure

Our application is a Maven project and therefore follows Maven structure. As we create the classes, we've organized them in logical layers: domain, repository, service, and controller.

Here's a preview of our project's structure:

Note: You might have noticed ignore an error icon in the jQuery file. This is an Eclipse validation issue. You can safely ignore this error.

The Layers

Domain Layer

This layer contains two POJOs, User and Role.


Controller Layer

This layer contains two controllers, MediatorController and UserController
  • MediatorController is responsible for redirecting requests to appropriate pages. This isn't really required but it's here for organizational purposes.
  • UserController is responsible for handling user-related requests such as adding and deleting of records


Service Layer

This layer contains two services, UserService and InitRedisService
  • UserService is our CRUD service for managing users
  • InitRedisService is used for initiliazing our database with sample data using the RedisTemplate


As mentioned in Part 1, we shall use Hashes to store Java objects in Redis. With the help of Spring Data for Redis, in particular the RedisTemplate, we're able to perform various Redis operations.

To access Hash operations using RedisTemplate, we use the following syntax:
template.opsForHash()
template.opsForHash().put
template.opsForHash().delete


To keep track of our users, we will use Set data structure for Redis
template.opsForSet()
template.opsForSet().add
template.opsForSet().remove


What is Spring Data Redis?

Spring Data for Redis is part of the umbrella Spring Data project which provides support for writing Redis applications. The Spring framework has always promoted a POJO programming model with a strong emphasis on portability and productivity. These values are carried over into Spring Data for Redis.

Source: http://www.springsource.org/spring-data/redis

Utility classes

TraceInterceptor class is an AOP-based utility class to help us debug our application. This is a subclass of CustomizableTraceInterceptor (see Spring Data JPA FAQ)


Next

In the next section, we will focus on the configuration files for enabling Spring MVC. Click here to proceed.
StumpleUpon DiggIt! Del.icio.us Blinklist Yahoo Furl Technorati Simpy Spurl Reddit Google I'm reading: Spring MVC 3.1 - Implement CRUD with Spring Data Redis (Part 3) ~ Twitter FaceBook

Subscribe by reader Subscribe by email Share

Spring MVC 3.1 - Implement CRUD with Spring Data Redis (Part 4)

Review

In the previous section, we have implemented the Java classes and discussed the Redis service. In this section, we will write the configuration files for enabling Spring MVC and Redis support.


Configuration

To enable Redis support, we need to declare the following beans
  • a Redis connection factory
  • a Redis template
  • Optionally, we declared an InitRedisService to automatically populate our database with sample data


Finally, here's our applicationContext.xml file

Next

In the next section, we will create the HTML and JavaScript files. Click here to proceed.
StumpleUpon DiggIt! Del.icio.us Blinklist Yahoo Furl Technorati Simpy Spurl Reddit Google I'm reading: Spring MVC 3.1 - Implement CRUD with Spring Data Redis (Part 4) ~ Twitter FaceBook

Subscribe by reader Subscribe by email Share

Spring MVC 3.1 - Implement CRUD with Spring Data Redis (Part 6)

Review

We have just completed our application! In the previous sections, we have discussed the functional specs, created the Java classes, declared the configuration files, and wrote the HTMl files. In this section, we will build and run the application using Maven, and show how to import the project in Eclipse.


Running the Application

Access the source code

To download the source code, please visit the project's Github repository (click here)

Preparing the data source

  1. Run Redis (see Part 2 for instructions)
  2. There's no need to populate the database with sample data because our InitRedisService will insert our sample data automatically

Building with Maven

  1. Ensure Maven is installed
  2. Open a command window (Windows) or a terminal (Linux/Mac)
  3. Run the following command:
    mvn tomcat:run
  4. You should see the following output:
    [INFO] Scanning for projects...
    [INFO] Searching repository for plugin with prefix: 'tomcat'.
    [INFO] artifact org.codehaus.mojo:tomcat-maven-plugin: checking for updates from central
    [INFO] artifact org.codehaus.mojo:tomcat-maven-plugin: checking for updates from snapshots
    [INFO] ------------------------------------------
    [INFO] Building spring-redis-tutorial Maven Webapp
    [INFO]    task-segment: [tomcat:run]
    [INFO] ------------------------------------------
    [INFO] Preparing tomcat:run
    [INFO] [apt:process {execution: default}]
    [INFO] [resources:resources {execution: default-resources}]
    [INFO] [tomcat:run {execution: default-cli}]
    [INFO] Running war on http://localhost:8080/spring-redis-tutorial
    Feb 8, 2012 8:57:04 PM org.apache.catalina.startup.Embedded start
    INFO: Starting tomcat server
    Feb 8, 2012 8:57:04 PM org.apache.catalina.core.StandardEngine start
    INFO: Starting Servlet Engine: Apache Tomcat/6.0.29
    Feb 8, 2012 8:57:05 PM org.apache.catalina.core.ApplicationContext log
    INFO: Initializing Spring root WebApplicationContext
    Feb 8, 2012 8:57:07 PM org.apache.coyote.http11.Http11Protocol init
    INFO: Initializing Coyote HTTP/1.1 on http-8080
    Feb 8, 2012 8:57:07 PM org.apache.coyote.http11.Http11Protocol start
    INFO: Starting Coyote HTTP/1.1 on http-8080
    
  5. Note: If the project will not build due to missing repositories, please enable the repositories section in the pom.xml!

Access the Entry page

  1. Follow the steps with Building with Maven
  2. Open a browser
  3. Enter the following URL (8080 is the default port for Tomcat):
    http://localhost:8080/spring-redis-tutorial/

Import the project in Eclipse

  1. Ensure Maven is installed
  2. Open a command window (Windows) or a terminal (Linux/Mac)
  3. Run the following command:
    mvn eclipse:eclipse -Dwtpversion=2.0
  4. You should see the following output:
    [INFO] Scanning for projects...
    [INFO] Searching repository for plugin with prefix: 'eclipse'.
    [INFO] org.apache.maven.plugins: checking for updates from central
    [INFO] org.apache.maven.plugins: checking for updates from snapshots
    [INFO] org.codehaus.mojo: checking for updates from central
    [INFO] org.codehaus.mojo: checking for updates from snapshots
    [INFO] artifact org.apache.maven.plugins:maven-eclipse-plugin: checking for updates from central
    [INFO] artifact org.apache.maven.plugins:maven-eclipse-plugin: checking for updates from snapshots
    [INFO] -----------------------------------------
    [INFO] Building spring-redis-tutorial Maven Webapp
    [INFO]    task-segment: [eclipse:eclipse]
    [INFO] -----------------------------------------
    [INFO] Preparing eclipse:eclipse
    [INFO] No goals needed for project - skipping
    [INFO] [eclipse:eclipse {execution: default-cli}]
    [INFO] Adding support for WTP version 2.0.
    [INFO] -----------------------------------------
    [INFO] BUILD SUCCESSFUL
    [INFO] -----------------------------------------
    
    This command will add the following files to your project:
    .classpath
    .project
    .settings
    target
    You may have to enable "show hidden files" in your file explorer to view them
  5. Open Eclipse and import the project

Conclusion

That's it! We've have successfully completed our Spring MVC 3.1 web application. We've learned how to setup Redis and access it through Spring Data Redis. Furthermore, we used AJAX to make the application responsive.

I hope you've enjoyed this tutorial. Don't forget to check my other tutorials at the Tutorials section.

Revision History


Revision Date Description
1 Feb 8 2012 Uploaded tutorial and Github repository

StumpleUpon DiggIt! Del.icio.us Blinklist Yahoo Furl Technorati Simpy Spurl Reddit Google I'm reading: Spring MVC 3.1 - Implement CRUD with Spring Data Redis (Part 6) ~ Twitter FaceBook

Subscribe by reader Subscribe by email Share

Spring MVC 3.1 - Implement CRUD with Spring Data Redis (Part 5)

Review

In the previous section, we have created the configuration files and discussed them accordingly. In this section, we will focus on the view layer, in particular the HTML files and JavaScript codes.


HTML Files (with AJAX)

To improve the user experience, we will use AJAX to make the application responsive. All actions will be performed on the same page (no page refresh). Consequently, we only have one HTML page for the entire application. The rest are JavaScript files.

Notice how we've structured the HTML page. Basically, we followed the concept of separation of concerns by separating markup tags, CSS, and JavaScript code. We tried as much as possible to make the JavaScript code and CSS styles unobtrusive.


A Closer Look

At first glance, this JSP file seems complex. On the contrary, it's quite simple. Let's break it into smaller pieces for clarity:

URLs
The following declares our URLs as mapped to our UserController. We're using the url taglib to make the URL portable.


Imports
Here we're importing custom CSS and JavaScript files, along with jQuery.


What is jQuery?
jQuery is a fast and concise JavaScript Library that simplifies HTML document traversing, event handling, animating, and Ajax interactions for rapid web development. jQuery is designed to change the way that you write JavaScript.

Source: http://jquery.com/

JavaScript initialization
Here we're preparing the URLs, attaching functions to our buttons, and initially loading the table. The main chunk of the JavaScript code is referenced from an external JavaScript file custom.js
  • loadTable(): Performs an AJAX request and populates our table with records
  • toggleForms(): Hides and shows specific forms based on the passed argument
  • toggleCrudButtons(): Hides and shows buttons
  • hasSelected(): Checks whether a record has been selected
  • fillEditForm(): Fills the Edit form with details based on the selected record
  • submitDeleteRecord(): Submits a delete request via AJAX
  • submitNewRecord(): Submits a create new record request via AJAX
  • submitUpdateRecord(): Submits an update record request via AJAX


Table and buttons
This is a simple table for displaying records. The buttons are for interacting with the data.


Forms
These are forms used when adding and editing records.


Preview

If we run our application, this is what we shall see:

Entry page

For more screenshots, please visit Part 1 of this tutorial and check the Screenshots section.

Next

In the next section, we will build and run the application using Maven, and show how to import the project in Eclipse. Click here to proceed.
StumpleUpon DiggIt! Del.icio.us Blinklist Yahoo Furl Technorati Simpy Spurl Reddit Google I'm reading: Spring MVC 3.1 - Implement CRUD with Spring Data Redis (Part 5) ~ Twitter FaceBook

Subscribe by reader Subscribe by email Share

Friday, January 20, 2012

Spring MVC 3.1 - Implement CRUD with Spring Data MongoDB (Part 1)

In this tutorial, we will create a simple CRUD application using Spring 3.1 and MongoDB. In particular, we will use Spring MVC to develop the web application and Spring Data MongoDB for the repository.


Dependencies

  • Spring core 3.1.0.RELEASE
  • Spring Data MongoDB 1.0.0.RELEASE
  • MongoDB (server) 2.0.2
  • MongoDB (Java driver) 2.7.2
  • See pom.xml for details

Github

To access the source code, please visit the project's Github repository (click here)

Functional Specs

Before we start, let's define our application's specs as follows:
  • A CRUD page for managing users
  • Use AJAX to avoid page refresh
  • Users have roles. They are either admin or regular (default)
  • Everyone can create new users and edit existing ones
  • When editing, users can only edit first name, last name, and role fields
  • A username is assumed to be unique

Here's our Use Case diagram:
[User]-(View)
[User]-(Add) 
[User]-(Edit) 
[User]-(Delete) 

Database

If you're new to MongoDB and coming from a SQL-background, please take some time to read the following resource SQL to Mongo Mapping Chart. It's a comparison between SQL and MongoDB.

We have two collections (tables in SQL): user and role. The user collection contains personal information of each user; whereas the role collection contains role values for each user where a value of 1 represents an admin and a value of 2 represents a regular user.

Here's the Class diagram:
# Cool UML Diagram
[User|id;firstName;lastName;username;password;role{bg:orange}]1--1> [Role|id;role{bg:green}]

User document

Below is the JSON structure of the User document after Spring Data MongoDB has created the collection:
{ 
   "_id" : "" , 
   "_class" : "org.krams.domain.User"
   "firstName" : ""
   "lastName" : ""
   "username" : ""
   "password" : "" , 
   "role" : { "$ref" : "role" , "$id" : "" }
}
Notice the role property is a reference to a Role record as indicated by $ref: role property.

Role document

Below is the JSON structure of the Role document after Spring Data MongoDB has created the collection:
{ 
   "_id" : ""
   "_class" : "org.krams.domain.Role"
   "role" : ""
}

Screenshots

Let's preview how the application will look like after it's finished. This is also a good way to clarify further the application's specs.

The Activity diagram:

http://yuml.me/diagram/activity/(start)-%3E%3Cd1%3Eview-%3E(Show%20Records)-%3E%7Ca%7C-%3E(end),%20%3Cd1%3Eadd-%3E(Show%20Form)-%3E%7Ca%7C,%20%3Cd1%3Eedit-%3E%3Cd2%3Ehas%20selected-%3E(Show%20Form)-%3E%7Ca%7C,%20%3Cd2%3Eno%20record%20selected-%3E(Popup%20Alert)-%3E%7Ca%7C,%20%3Cd1%3Edelete-%3E%3Cd3%3Ehas%20selected-%3E(Delete%20Record)-%3E%7Ca%7C,%20%3Cd3%3Eno%20record%20selected-%3E(Popup%20Alert)-%3E%7Ca%7C.

Entry page
The entry page is the primary page that users will see. It contains a table showing user records and four buttons for adding, editing, deleting, and reloading data. All interactions will happen in this page.

Entry page

Edit existing record
When user clicks the Edit button, an Edit Record form shall appear after the table.

Edit record form

When a user submits the form, a success or failure alert should appear.

Success alert

When the operation is successful, the update record should reflect on the table.

Edited record appears on the table

Create new record
When a user clicks the New button, a Create New Record form shall appear after the table.

Create new record form

When a user submits the form, a success or failure alert should appear.

Success alert

When the operation is successful, the new record should appear on the table.

New record shows on the form

Delete record
When user clicks the Delete button, a success or failure alert should appear.

Success alert

Reload record
When user clicks the Reload button, the data on the table should be reloaded.

Errors
When user clicks the Edit or Delete button without selecting a record first, a "Select a record first!" alert should appear.

Error alert

Next

In the next section, we will study how to setup a MongoDB server both in Windows and Ubuntu. Click here to proceed.
StumpleUpon DiggIt! Del.icio.us Blinklist Yahoo Furl Technorati Simpy Spurl Reddit Google I'm reading: Spring MVC 3.1 - Implement CRUD with Spring Data MongoDB (Part 1) ~ Twitter FaceBook

Subscribe by reader Subscribe by email Share

Spring MVC 3.1 - Implement CRUD with Spring Data MongoDB (Part 3)

Review

In the previous section, we have learned how to setup a MongoDB server in Windows and Ubuntu. In this section, we will discuss the project's structure, write the Java classes, and organize them in layers.


Project Structure

Our application is a Maven project and therefore follows Maven structure. As we create the classes, we've organized them in logical layers: domain, repository, service, and controller.

Here's a preview of our project's structure:

The Layers

Domain Layer

This layer contains two classes, User and Role. They represent our database collections, user and role respectively. We're using Spring Data MongoDB to simplify MongoDB access. And to optimize these classes for the framework, we've added the @Document annotation. If you're familiar with JPA, this is similar to the @Entity annotation.

Notice the User class has a reference to a Role property. In order to achieve that, we must annotate the field with @DBRef.


Mapping annotation overview
  • @Id - applied at the field level to mark the field used for identiy purpose.
  • @Document - applied at the class level to indicate this class is a candidate for mapping to the database. You can specify the name of the collection where the database will be stored.
  • @DBRef - applied at the field to indicate it is to be stored using a com.mongodb.DBRef.
Source: http://static.springsource.org/spring-data/data-document/docs/current/reference/html/

Controller Layer

This layer contains two controllers, MediatorController and UserController
  • MediatorController is responsible for redirecting requests to appropriate pages. This isn't really required but it's here for organizational purposes.
  • UserController is responsible for handling user-related requests such as adding and deleting of records


Service Layer

This layer contains two services, UserService and InitMongoService
  • UserService is our CRUD service for the user collection. All data access is delegated to the repositories
  • InitMongoService is used for initiliazing our database with sample data. Notice we're using the MongoTemplate itself instead of the Spring Data MongoDB-based repository. There is no difference between the two. In fact, it's simpler if we used Spring Data instead. But I have chosen MongoTemplate to show an alternative way of interacting with the database


Note
The mapping framework does not handle cascading saves. If you change an Account object that is referenced by a Person object, you must save the Account object separately. Calling save on the Person object will not automatically save the Account objects in the property accounts.

Source: Spring Data MongoDB Reference (7.3.3. Using DBRefs)

Repository Layer

This layer contains two repositories, UserRepository and RoleRepository. These are our data access objects (DAO). With the help of Spring Data MongoDB, Spring will automatically provide the actual implementation. Notice for custom methods we just have to add the method signature.

What is Spring Data MongoDB?
Spring Data for MongoDB is part of the umbrella Spring Data project which aims to provide a familiar and consistent Spring-based programming model for for new datastores while retaining store-specific features and capabilities. The Spring Data MongoDB project provides integration with the MongoDB document database. Key functional areas of Spring Data MongoDB are a POJO centric model for interacting with a MongoDB DBCollection and easily writing a Repository style data access layer

Source: http://www.springsource.org/spring-data/mongodb


Utility classes

TraceInterceptor class is an AOP-based utility class to help us debug our application. This is a subclass of CustomizableTraceInterceptor (see Spring Data JPA FAQ)


Next

In the next section, we will focus on the configuration files for enabling Spring MVC. Click here to proceed.
StumpleUpon DiggIt! Del.icio.us Blinklist Yahoo Furl Technorati Simpy Spurl Reddit Google I'm reading: Spring MVC 3.1 - Implement CRUD with Spring Data MongoDB (Part 3) ~ Twitter FaceBook

Subscribe by reader Subscribe by email Share

Spring MVC 3.1 - Implement CRUD with Spring Data MongoDB (Part 2)

Review

In the previous section, we have laid down the functional specs of the application. In this section, we will learn how to setup a MongoDB server both in Windows and Ubuntu.


MongoDB Setup

We will first tackle how to setup MongoDB in Windows, in particular Windows 7; then we will focus on Ubuntu, in particular Ubuntu 10.04.

Windows 7

To setup a MongoDB server in Windows, follow these steps:

1. Open a browser and visit the MongoDB download section at http://www.mongodb.org/downloads

2. Under the Production Release, choose the file that matches your operating system. In our case, it's Windows 32-bit.

3. Once downloaded, extract the contents of the zip file

4. Open the extracted folder and browse under the bin directory. You should see the following executables

5. Select and run mongod.exe application.

6. You should see a command prompt with a similar output:

Do not close the command prompt. Your MongoDB server is now running.

Note: If the command prompt abruptly appears and then disappears, it's possible that the data/db path is missing in your file system.

To verify this,
  1. Open a new command prompt
  2. Run mongod.exe (either by dragging the executable or typing manually the full path)
  3. Read the error and check if it's similar with the following:
    [initandlisten] exception in initAndListen: 10296 dbpath (/d
    ata/db) does not exist, terminating
    dbexit:
    [initandlisten] shutdown: going to close listening sockets...
    [initandlisten] shutdown: going to flush diaglog...
    [initandlisten] shutdown: going to close sockets...
    [initandlisten] shutdown: waiting for fs preallocator...
    [initandlisten] shutdown: closing all files...
    [initandlisten] closeAllFiles() finished
    dbexit: really exiting now
    
  4. If it's the same message, please proceed below to resolve the issue.

To resolve this issue, follow these steps:
  1. Go to C:\ drive
  2. Create a new folder data
  3. Open data
  4. Create a new folder db
  5. Then run mongod.exe again. You should see MongoDB running now.

Ubuntu 10.04

To setup a MongoDB server in Ubuntu, follow these steps:

1. Open a browser and visit the MongoDB download section at http://www.mongodb.org/downloads

2. Under the Production Release, choose the file that matches your operating system. In our case, it's Linux 32-bit.

3. Once downloaded, extract the contents of the compressed file

4. Open the extracted folder and browse under the bin directory. You should see the following executables. Pay attention to mongod.

5. Let's make mongod executable. There are two ways: GUI and terminal-based

GUI-based:
  1. Right-click on the mongod application
  2. Open the "Permissions" tab.
  3. Ensure that "Allow executing file as program" is checked

Terminal-based:
  1. Open a terminal
  2. Run the following command:
    sudo chmod +x PATH/TO/YOUR/MONGO/bin/mongod
    
    
    Make sure to change the path to your Mongo directory.

6. Open a terminal and run the following command:
PATH/TO/YOUR/MONGO/bin/mongod


7. You should see a similar output indicating that your MongoDB server is now running:

Note: If in case there's an error, make sure that /data/db directory exists in the file system. This is similar with the Windows error above.

Next

In the next section, we will discuss the project's structure and start writing the Java classes. Click here to proceed.
StumpleUpon DiggIt! Del.icio.us Blinklist Yahoo Furl Technorati Simpy Spurl Reddit Google I'm reading: Spring MVC 3.1 - Implement CRUD with Spring Data MongoDB (Part 2) ~ Twitter FaceBook

Subscribe by reader Subscribe by email Share

Spring MVC 3.1 - Implement CRUD with Spring Data MongoDB (Part 4)

Review

In the previous section, we have implemented the Java classes and organized them in various layers. In this section, we will write the configuration files, which are mainly XML documents.


Configuration

To enable MongoDB repository, including template support, we have to declare the following beans:
  • a Mongo repository
  • a Mongo host
  • a Mongo template
  • Optionally, we declared an InitMongoService to automatically populate our database with sample data


For MongoDB connection, we've extracted the database properties in a separate file.


Finally, here's our applicationContext.xml file

Next

In the next section, we will create the HTML and JavaScript files. Click here to proceed.
StumpleUpon DiggIt! Del.icio.us Blinklist Yahoo Furl Technorati Simpy Spurl Reddit Google I'm reading: Spring MVC 3.1 - Implement CRUD with Spring Data MongoDB (Part 4) ~ Twitter FaceBook

Subscribe by reader Subscribe by email Share

Spring MVC 3.1 - Implement CRUD with Spring Data MongoDB (Part 6)

Review

We have just completed our application! In the previous sections, we have discussed the functional specs, created the Java classes, declared the configuration files, and wrote the HTMl files. In this section, we will build and run the application using Maven, and show how to import the project in Eclipse.


Running the Application

Access the source code

To download the source code, please visit the project's Github repository (click here)

Preparing the data source

  1. Run MongoDB (see Part 2 for instructions)
  2. There's no need to create any collections because Spring will create them automatically
  3. There's no need to populate the database with sample data because our InitMongoService will insert our sample data automatically

Building with Maven

  1. Ensure Maven is installed
  2. Open a command window (Windows) or a terminal (Linux/Mac)
  3. Run the following command:
    mvn tomcat:run
  4. You should see the following output:
    [INFO] Scanning for projects...
    [INFO] Searching repository for plugin with prefix: 'tomcat'.
    [INFO] artifact org.codehaus.mojo:tomcat-maven-plugin: checking for updates from central
    [INFO] artifact org.codehaus.mojo:tomcat-maven-plugin: checking for updates from snapshots
    [INFO] ------------------------------------------
    [INFO] Building spring-mongodb-tutorial Maven Webapp
    [INFO]    task-segment: [tomcat:run]
    [INFO] ------------------------------------------
    [INFO] Preparing tomcat:run
    [INFO] [apt:process {execution: default}]
    [INFO] [resources:resources {execution: default-resources}]
    [INFO] [tomcat:run {execution: default-cli}]
    [INFO] Running war on http://localhost:8080/spring-mongodb-tutorial
    Jan 20, 2012 8:45:19 PM org.apache.catalina.startup.Embedded start
    INFO: Starting tomcat server
    Jan 20, 2012 8:45:19 PM org.apache.catalina.core.StandardEngine start
    INFO: Starting Servlet Engine: Apache Tomcat/6.0.29
    Jan 20, 2012 8:45:19 PM org.apache.catalina.core.ApplicationContext log
    INFO: Initializing Spring root WebApplicationContext
    Jan 20, 2012 8:45:22 PM org.apache.coyote.http11.Http11Protocol init
    INFO: Initializing Coyote HTTP/1.1 on http-8080
    Jan 20, 2012 8:45:22 PM org.apache.coyote.http11.Http11Protocol start
    INFO: Starting Coyote HTTP/1.1 on http-8080
    
  5. Note: If the project will not build due to missing repositories, please enable the repositories section in the pom.xml!

Access the Entry page

  1. Follow the steps with Building with Maven
  2. Open a browser
  3. Enter the following URL (8080 is the default port for Tomcat):
    http://localhost:8080/spring-mongodb-tutorial/

Import the project in Eclipse

  1. Ensure Maven is installed
  2. Open a command window (Windows) or a terminal (Linux/Mac)
  3. Run the following command:
    mvn eclipse:eclipse -Dwtpversion=2.0
  4. You should see the following output:
    [INFO] Scanning for projects...
    [INFO] Searching repository for plugin with prefix: 'eclipse'.
    [INFO] org.apache.maven.plugins: checking for updates from central
    [INFO] org.apache.maven.plugins: checking for updates from snapshots
    [INFO] org.codehaus.mojo: checking for updates from central
    [INFO] org.codehaus.mojo: checking for updates from snapshots
    [INFO] artifact org.apache.maven.plugins:maven-eclipse-plugin: checking for updates from central
    [INFO] artifact org.apache.maven.plugins:maven-eclipse-plugin: checking for updates from snapshots
    [INFO] -----------------------------------------
    [INFO] Building spring-mongodb-tutorial Maven Webapp
    [INFO]    task-segment: [eclipse:eclipse]
    [INFO] -----------------------------------------
    [INFO] Preparing eclipse:eclipse
    [INFO] No goals needed for project - skipping
    [INFO] [eclipse:eclipse {execution: default-cli}]
    [INFO] Adding support for WTP version 2.0.
    [INFO] -----------------------------------------
    [INFO] BUILD SUCCESSFUL
    [INFO] -----------------------------------------
    
    This command will add the following files to your project:
    .classpath
    .project
    .settings
    target
    You may have to enable "show hidden files" in your file explorer to view them
  5. Open Eclipse and import the project

Conclusion

That's it! We've have successfully completed our Spring MVC 3.1 web application. We've learned how to setup MongoDB and access it through Spring Data MongoDB. Furthermore, we used AJAX to make the application responsive.

I hope you've enjoyed this tutorial. Don't forget to check my other tutorials at the Tutorials section.

Revision History


Revision Date Description
1 Jan 20 2012 Uploaded tutorial and Github repository
2 Jan 22 2012 Updated description of InitMongoService
3 Jan 23 2012 Added class, use case, and activity diagrams

StumpleUpon DiggIt! Del.icio.us Blinklist Yahoo Furl Technorati Simpy Spurl Reddit Google I'm reading: Spring MVC 3.1 - Implement CRUD with Spring Data MongoDB (Part 6) ~ Twitter FaceBook

Subscribe by reader Subscribe by email Share

Spring MVC 3.1 - Implement CRUD with Spring Data MongoDB (Part 5)

Review

In the previous section, we have created the configuration files and discussed them accordingly. In this section, we will focus on the view layer, in particular the HTML files and JavaScript codes.


HTML Files (with AJAX)

To improve the user experience, we will use AJAX to make the application responsive. All actions will be performed on the same page (no page refresh). Consequently, we only have one HTML page for the entire application. The rest are JavaScript files.

Notice how we've structured the HTML page. Basically, we followed the concept of separation of concerns by separating markup tags, CSS, and JavaScript code. We tried as much as possible to make the JavaScript code and CSS styles unobtrusive.


A Closer Look

At first glance, this JSP file seems complex. On the contrary, it's quite simple. Let's break it into smaller pieces for clarity:

URLs
The following declares our URLs as mapped to our UserController. We're using the url taglib to make the URL portable.


Imports
Here we're importing custom CSS and JavaScript files, along with jQuery.


What is jQuery?
jQuery is a fast and concise JavaScript Library that simplifies HTML document traversing, event handling, animating, and Ajax interactions for rapid web development. jQuery is designed to change the way that you write JavaScript.

Source: http://jquery.com/

JavaScript initialization
Here we're preparing the URLs, attaching functions to our buttons, and initially loading the table. The main chunk of the JavaScript code is referenced from an external JavaScript file custom.js
  • loadTable(): Performs an AJAX request and populates our table with records
  • toggleForms(): Hides and shows specific forms based on the passed argument
  • toggleCrudButtons(): Hides and shows buttons
  • hasSelected(): Checks whether a record has been selected
  • fillEditForm(): Fills the Edit form with details based on the selected record
  • submitDeleteRecord(): Submits a delete request via AJAX
  • submitNewRecord(): Submits a create new record request via AJAX
  • submitUpdateRecord(): Submits an update record request via AJAX


Table and buttons
This is a simple table for displaying records. The buttons are for interacting with the data.


Forms
These are forms used when adding and editing records.


Preview

If we run our application, this is what we shall see:

Entry page

For more screenshots, please visit Part 1 of this tutorial and check the Screenshots section.

Next

In the next section, we will build and run the application using Maven, and show how to import the project in Eclipse. Click here to proceed.
StumpleUpon DiggIt! Del.icio.us Blinklist Yahoo Furl Technorati Simpy Spurl Reddit Google I'm reading: Spring MVC 3.1 - Implement CRUD with Spring Data MongoDB (Part 5) ~ Twitter FaceBook

Subscribe by reader Subscribe by email Share

Saturday, March 19, 2011

Spring - Hibernate: Many-To-One Association

Introduction

In this tutorial we'll explore how to implement a many-to-one association using Hibernate Annotations and Spring MVC 3. We will use @ManyToOne annotation to specify the relationship between our objects. We will not specify Cascade types or Fetch strategies, but instead rely on @ManyToOne's default settings.

If you want to see how to implement this project using @OneToMany annotation instead, see Spring - Hibernate: One-To-Many Association.

Spring MVC 3 and Hibernate Tutorials Series
Spring - Hibernate: Many-To-One Association - Explicitly Specify Join Table, Cascade, and Fetch
Spring - Hibernate: One-To-Many Association - Explicitly Specify Join Table, Cascade, and Fetch
Spring - Hibernate: Many-To-One Association
Spring - Hibernate: One-To-Many Association
Spring MVC 3, Hibernate Annotations, MySQL Integration Tutorial
Spring MVC 3, Hibernate Annotations, HSQLDB Integration Tutorial

What is Many-To-One Association?
A many-to-one relationship is where one entity (typically a column or set of columns) contains values that refer to another entity (a column or set of columns) that has unique values.

Source: http://publib.boulder.ibm.com/infocenter/ablxhelp/v8r4m0/index.jsp?topic=/com.ibm.db2.abx.cub.doc/abx-c-cube-many21relationships.html

Specification

Our application is simple CRUD system for managing a list of records. Each record corresponds to a single person containing personal information and credit card details. Each person can own zero or more credit cards. Moreover, a person's person information is edited separately from his credit card details.

Below are sample screenshots from the application:


Domain Objects

Based on the specs, we have two domain objects: Person and Credit Card.

A Person object has the following properties:
  • id
  • first name
  • last name
  • money

Whereas a Credit Card object has the following properties:
  • id
  • type
  • number
  • person

Notice each Credit Card has a reference to a Person hence, the many-to-one relationship. We can of course look at this relationship the other way around: one-to-many relationship. See Spring - Hibernate: One-To-Many Association

Development

We'll split our development in three layers: Domain, Service, and Controller. Then we'll declare the configuration files. Let's start with the Domain layer.

Domain Layer

As discussed earlier, we have two domain objects: Person and Credit Card. Consequently, we'll declare two POJOs to represent our domain. Each POJO will be annotated with @Entity so that we can persist them to a database.

Person.java
package org.krams.tutorial.domain;

import java.io.Serializable;
import javax.persistence.Column;
import javax.persistence.Entity;
import javax.persistence.GeneratedValue;
import javax.persistence.Id;
import javax.persistence.Table;

/**
 * Represents a person entity
 * 
 * @author Krams at {@link http://krams915@blogspot.com
 */
@Entity
@Table(name = "PERSON")
public class Person implements Serializable {

 private static final long serialVersionUID = -5527566248002296042L;
 
 @Id
 @Column(name = "ID")
 @GeneratedValue
 private Integer id;
 
 @Column(name = "FIRST_NAME")
 private String firstName;
 
 @Column(name = "LAST_NAME")
 private String lastName;
 
 @Column(name = "MONEY")
 private Double money;
 
 public Integer getId() {
  return id;
 }

 public void setId(Integer id) {
  this.id = id;
 }

 public String getFirstName() {
  return firstName;
 }

 public void setFirstName(String firstName) {
  this.firstName = firstName;
 }

 public String getLastName() {
  return lastName;
 }

 public void setLastName(String lastName) {
  this.lastName = lastName;
 }

 public Double getMoney() {
  return money;
 }

 public void setMoney(Double money) {
  this.money = money;
 }
}

Person object has been mapped to the PERSON table. The table that gets auto-generated looks as follows:


CreditCard.java
package org.krams.tutorial.domain;

import java.io.Serializable;

import javax.persistence.Column;
import javax.persistence.Entity;
import javax.persistence.GeneratedValue;
import javax.persistence.Id;
import javax.persistence.ManyToOne;
import javax.persistence.Table;

/**
 * Represents a credit card entity
 * 
 * @author Krams at {@link http://krams915@blogspot.com
 */
@Entity
@Table(name = "CREDIT_CARD")
public class CreditCard implements Serializable {

 private static final long serialVersionUID = 5924361831551833717L;

 @Id
 @Column(name = "ID")
 @GeneratedValue
 private Integer id;
 
 @Column(name = "TYPE")
 private String type;
 
 @Column(name = "NUMBER")
 private String number;

 @ManyToOne
 private Person person;
 
 public Integer getId() {
  return id;
 }

 public void setId(Integer id) {
  this.id = id;
 }

 public String getType() {
  return type;
 }

 public void setType(String type) {
  this.type = type;
 }

 public String getNumber() {
  return number;
 }

 public void setNumber(String number) {
  this.number = number;
 }

 public Person getPerson() {
  return person;
 }

 public void setPerson(Person person) {
  this.person = person;
 }
 
 
}

CreditCard object has been mapped to the CREDIT_CARD table. The table that gets auto-generated looks as follows:


The CREDIT_CARD table has a person_ID field that references a person on the Person table via its id. Notice the @ManyToOne annotation for the field person. We did not specify any Cascade type or Fetch strategy for this field. Instead, we rely on the annotation's default settings.

@Entity
@Table(name = "CREDIT_CARD")
public class CreditCard implements Serializable {

 ...
 @ManyToOne
 private Person person;
 ...
}

Using phpymyadmin's database designer, the Hibernate auto-generated relationship between Person and CreditCard looks as follows:


Again using phpymyadmin, the auto-generated tables looks as follows:


We declared two entities: a Person entity and a CreditCard entity. We expect two tables in the database, and we did. However, if we've implemented this using the default settings of @OneToMany annotation, we get three tables instead. See Spring - Hibernate: One-To-Many Association

Service Layer

After declaring the Domain objects, we'll now proceed with the Service layer which contains two services: a PersonService and a CreditCardService.

PersonService
PersonService is responsible for handling CRUD operations for Person entities. Each method is eventually delegated to a Hibernate Session object.

PersonService.java
package org.krams.tutorial.service;

import java.util.List;
import javax.annotation.Resource;

import org.apache.log4j.Logger;
import org.hibernate.Query;
import org.hibernate.Session;
import org.hibernate.SessionFactory;
import org.krams.tutorial.domain.Person;
import org.springframework.stereotype.Service;
import org.springframework.transaction.annotation.Transactional;

/**
 * Service for processing Persons
 * 
 * @author Krams at {@link http://krams915@blogspot.com
 */
@Service("personService")
@Transactional
public class PersonService {

 protected static Logger logger = Logger.getLogger("service");
 
 @Resource(name="sessionFactory")
 private SessionFactory sessionFactory;
 
 /**
  * Retrieves all persons
  * 
  * @return a list of persons
  */
 public List<Person> getAll() {
  logger.debug("Retrieving all persons");
  
  // Retrieve session from Hibernate
  Session session = sessionFactory.getCurrentSession();
  
  // Create a Hibernate query (HQL)
  Query query = session.createQuery("FROM  Person");
  
  // Retrieve all
  return  query.list();
 }
 
 /**
  * Retrieves a single person
  */
 public Person get( Integer id ) {
  // Retrieve session from Hibernate
  Session session = sessionFactory.getCurrentSession();
  
  // Retrieve existing person
  Person person = (Person) session.get(Person.class, id);
  
  return person;
 }
 
 /**
  * Adds a new person
  */
 public void add(Person person) {
  logger.debug("Adding new person");
  
  // Retrieve session from Hibernate
  Session session = sessionFactory.getCurrentSession();
  
  // Persists to db
  session.save(person);
 }
 
 /**
  * Deletes an existing person
  * @param id the id of the existing person
  */
 public void delete(Integer id) {
  logger.debug("Deleting existing person");
  
  // Retrieve session from Hibernate
  Session session = sessionFactory.getCurrentSession();
  
  // Retrieve existing person
  Person person = (Person) session.get(Person.class, id);
  
  // Delete 
  session.delete(person);
 }
 
 /**
  * Edits an existing person
  */
 public void edit(Person person) {
  logger.debug("Editing existing person");
  
  // Retrieve session from Hibernate
  Session session = sessionFactory.getCurrentSession();
  
  // Retrieve existing person via id
  Person existingPerson = (Person) session.get(Person.class, person.getId());
  
  // Assign updated values to this person
  existingPerson.setFirstName(person.getFirstName());
  existingPerson.setLastName(person.getLastName());
  existingPerson.setMoney(person.getMoney());

  // Save updates
  session.save(existingPerson);
 }
}

CreditCardService
CreditCardService is responsible for handling CRUD operations for CreditCard entities. Each method is eventually delegated to a Hibernate Session object.

CreditCardService.java
package org.krams.tutorial.service;

import java.util.List;
import javax.annotation.Resource;

import org.apache.log4j.Logger;
import org.hibernate.Query;
import org.hibernate.Session;
import org.hibernate.SessionFactory;
import org.krams.tutorial.domain.CreditCard;
import org.krams.tutorial.domain.Person;
import org.springframework.stereotype.Service;
import org.springframework.transaction.annotation.Transactional;

/**
 * Service for processing Credit Cards
 * 
 * @author Krams at {@link http://krams915@blogspot.com
 */
@Service("creditCardService")
@Transactional
public class CreditCardService {

 protected static Logger logger = Logger.getLogger("service");
 
 @Resource(name="sessionFactory")
 private SessionFactory sessionFactory;
 
 /**
  * Retrieves all credit cards
  */
 public List<CreditCard> getAll(Integer personId) {
  logger.debug("Retrieving all credit cards");
  
  // Retrieve session from Hibernate
  Session session = sessionFactory.getCurrentSession();
  
  // Create a Hibernate query (HQL)
  Query query = session.createQuery("FROM  CreditCard WHERE person.id=" +personId);
  
  // Retrieve all
  return  query.list();
 }
 
 /**
  * Retrieves all credit cards
  */
 public List<CreditCard> getAll() {
  logger.debug("Retrieving all credit cards");
  
  // Retrieve session from Hibernate
  Session session = sessionFactory.getCurrentSession();
  
  // Create a Hibernate query (HQL)
  Query query = session.createQuery("FROM  CreditCard");
  
  // Retrieve all
  return  query.list();
 }
 
 /**
  * Retrieves a single credit card
  */
 public CreditCard get( Integer id ) {
  // Retrieve session from Hibernate
  Session session = sessionFactory.getCurrentSession();
  
  // Retrieve existing credit card
  CreditCard creditCard = (CreditCard) session.get(CreditCard.class, id);
  
  // Persists to db
  return creditCard;
 }
 
 /**
  * Adds a new credit card
  */
 public void add(Integer personId, CreditCard creditCard) {
  logger.debug("Adding new credit card");
  
  // Retrieve session from Hibernate
  Session session = sessionFactory.getCurrentSession();
  
  // Retrieve existing person via id
  Person existingPerson = (Person) session.get(Person.class, personId);
  
  // Add person to credit card
  creditCard.setPerson(existingPerson);
  
  // Persists to db
  session.save(creditCard);
 }
 
 /**
  * Deletes an existing credit card
  */
 public void delete(Integer id) {
  logger.debug("Deleting existing credit card");
  
  // Retrieve session from Hibernate
  Session session = sessionFactory.getCurrentSession();
  
  // Retrieve existing credit card
  CreditCard creditCard = (CreditCard) session.get(CreditCard.class, id);
  
  // Delete 
  session.delete(creditCard);
 }
 
 /**
  * Deletes all credit cards based on the person's id
  */
 public void deleteAll(Integer personId) {
  logger.debug("Deleting existing credit cards based on person's id");
  
  // Retrieve session from Hibernate
  Session session = sessionFactory.getCurrentSession();
  
  // Create a Hibernate query (HQL)
  Query query = session.createQuery("DELETE FROM CreditCard WHERE person.id=" +personId);
  
  // Delete all
  query.executeUpdate();
 }
 
 /**
  * Edits an existing credit card
  */
 public void edit(CreditCard creditCard) {
  logger.debug("Editing existing creditCard");
  
  // Retrieve session from Hibernate
  Session session = sessionFactory.getCurrentSession();
  
  // Retrieve existing credit card via id
  CreditCard existingCreditCard = (CreditCard) session.get(CreditCard.class, creditCard.getId());
  
  // Assign updated values to this credit card
  existingCreditCard.setNumber(creditCard.getNumber());
  existingCreditCard.setType(creditCard.getType());

  // Save updates
  session.save(existingCreditCard);
 }
}

Controller Layer

After declaring the Domain and Service objects, we'll now proceed with the Controller layer.
We'll declare two controllers: MainController and CreditCardController.

MainController
MainController is responsible for handling request for Person records. Each CRUD request is ultimately delegated to the PersonService and then returns an appropriate JSP page.

MainController.java
package org.krams.tutorial.controller;

import java.util.ArrayList;
import java.util.List;

import javax.annotation.Resource;

import org.apache.log4j.Logger;
import org.krams.tutorial.domain.Person;
import org.krams.tutorial.dto.PersonDTO;
import org.krams.tutorial.service.CreditCardService;
import org.krams.tutorial.service.PersonService;
import org.springframework.stereotype.Controller;
import org.springframework.ui.Model;
import org.springframework.web.bind.annotation.ModelAttribute;
import org.springframework.web.bind.annotation.RequestMapping;
import org.springframework.web.bind.annotation.RequestMethod;
import org.springframework.web.bind.annotation.RequestParam;


/**
 * Handles and retrieves person request
 * 
 * @author Krams at {@link http://krams915@blogspot.com
 */
@Controller
@RequestMapping("/main/record")
public class MainController {

 protected static Logger logger = Logger.getLogger("controller");
 
 @Resource(name="personService")
 private PersonService personService;
 
 @Resource(name="creditCardService")
 private CreditCardService creditCardService;
 
 /**
  * Retrieves the "Records" page
  */
    @RequestMapping(value = "/list", method = RequestMethod.GET)
    public String getRecords(Model model) {
     logger.debug("Received request to show records page");
     
     // Retrieve all persons
     List<Person> persons = personService.getAll();
     
     // Prepare model object
     List<PersonDTO> personsDTO = new ArrayList<PersonDTO>();
     
     for (Person person: persons) {
      // Create new data transfer object
      PersonDTO dto = new PersonDTO();
      
   dto.setId(person.getId());
   dto.setFirstName(person.getFirstName());
   dto.setLastName(person.getLastName());
   dto.setMoney(person.getMoney());
   dto.setCreditCards(creditCardService.getAll(person.getId()));
   
   // Add to model list
   personsDTO.add(dto);
     }
     
     // Add to model
     model.addAttribute("persons", personsDTO);

     // This will resolve to /WEB-INF/jsp/records.jsp
  return "records";
 }
    
    /**
     *  Retrieves the "Add New Record" page
     */
    @RequestMapping(value = "/add", method = RequestMethod.GET)
    public String getAdd(Model model) {
     logger.debug("Received request to show add page");
    
     // Create new Person and add to model
     model.addAttribute("personAttribute", new Person());

     // This will resolve to /WEB-INF/jsp/add-record.jsp
     return "add-record";
 }
 
    /**
     * Adds a new record
     */
    @RequestMapping(value = "/add", method = RequestMethod.POST)
    public String postAdd(@ModelAttribute("personAttribute") Person person) {
  logger.debug("Received request to add new record");

  // Delegate to service
  personService.add(person);

  // Redirect to url
  return "redirect:/krams/main/record/list";
 }
    
    /**
     * Deletes a record including all the associated credit cards
     */
    @RequestMapping(value = "/delete", method = RequestMethod.GET)
    public String getDelete(@RequestParam("id") Integer personId) {
     logger.debug("Received request to delete record");
    
     // Delete all associated credit cards first
     creditCardService.deleteAll(personId);
     
     // Delete person
  personService.delete(personId);

  // Redirect to url
  return "redirect:/krams/main/record/list";
 }
    
    /**
     * Retrieves the "Edit Existing Record" page
     */
    @RequestMapping(value = "/edit", method = RequestMethod.GET)
    public String getEdit(@RequestParam("id") Integer personId, Model model) {
     logger.debug("Received request to show edit page");
     
     // Retrieve person by id
     Person existingPerson = personService.get(personId);

     // Add to model
     model.addAttribute("personAttribute", existingPerson);

     // This will resolve to /WEB-INF/jsp/edit-record.jsp
     return "edit-record";
 }
 
    /**
     * Edits an existing record
     */
    @RequestMapping(value = "/edit", method = RequestMethod.POST)
    public String postEdit(@RequestParam("id") Integer personId, 
              @ModelAttribute("personAttribute") Person person) {
  logger.debug("Received request to add new person");
  
  // Assign id
  person.setId(personId);
  
  // Delegate to service
  personService.edit(person);

  // Redirect to url
  return "redirect:/krams/main/record/list";
 }
    
}

Pay attention to the delete() method. In order to delete a Person record, we have to delete first all the associated Credit Cards. Then we delete the Person record.

/**
     * Deletes a record including all the associated credit cards
     */
    @RequestMapping(value = "/delete", method = RequestMethod.GET)
    public String getDelete(@RequestParam("id") Integer personId) {
     logger.debug("Received request to delete record");
    
     // Delete all associated credit cards first
     creditCardService.deleteAll(personId);
     
     // Delete person
  personService.delete(personId);

  // Redirect to url
  return "redirect:/krams/main/record/list";
 }


Notice the getRecords() method maps the Person and CreditCard records to a data transfer object: PersonDTO

/**
  * Retrieves the "Records" page
  */
    @RequestMapping(value = "/list", method = RequestMethod.GET)
    public String getRecords(Model model) {
     logger.debug("Received request to show records page");
     
     // Retrieve all persons
     List<Person> persons = personService.getAll();
     
     // Prepare model object
     List<PersonDTO> personsDTO = new ArrayList<PersonDTO>();
     
     for (Person person: persons) {
      // Create new data transfer object
      PersonDTO dto = new PersonDTO();
      
   dto.setId(person.getId());
   dto.setFirstName(person.getFirstName());
   dto.setLastName(person.getLastName());
   dto.setMoney(person.getMoney());
   dto.setCreditCards(creditCardService.getAll(person.getId()));
   
   // Add to model list
   personsDTO.add(dto);
     }
     
     // Add to model
     model.addAttribute("persons", personsDTO);

     // This will resolve to /WEB-INF/jsp/records.jsp
  return "records";
 }

PersonDTO acts as a data model for the records.jsp view.

PersonDTO.java
package org.krams.tutorial.dto;

import java.util.List;

import org.krams.tutorial.domain.CreditCard;

/**
 * Data Transfer Object for displaying purposes
 */
public class PersonDTO {

 private Integer id;
 private String firstName;
 private String lastName;
 private Double money;
 private List<CreditCard> creditCards;
 
 public Integer getId() {
  return id;
 }
 public void setId(Integer id) {
  this.id = id;
 }
 public String getFirstName() {
  return firstName;
 }
 public void setFirstName(String firstName) {
  this.firstName = firstName;
 }
 public String getLastName() {
  return lastName;
 }
 public void setLastName(String lastName) {
  this.lastName = lastName;
 }
 public Double getMoney() {
  return money;
 }
 public void setMoney(Double money) {
  this.money = money;
 }
 public List<CreditCard> getCreditCards() {
  return creditCards;
 }
 public void setCreditCards(List<CreditCard> creditCards) {
  this.creditCards = creditCards;
 }
}

CreditCardController
CreditCardController is responsible for handling request for credit card records. We won't be using all methods available in this controller. They had been added for the sake of completeness.

CreditCardController.java
package org.krams.tutorial.controller;

import javax.annotation.Resource;

import org.apache.log4j.Logger;
import org.krams.tutorial.domain.CreditCard;
import org.krams.tutorial.service.CreditCardService;
import org.krams.tutorial.service.PersonService;
import org.springframework.stereotype.Controller;
import org.springframework.ui.Model;
import org.springframework.web.bind.annotation.ModelAttribute;
import org.springframework.web.bind.annotation.RequestMapping;
import org.springframework.web.bind.annotation.RequestMethod;
import org.springframework.web.bind.annotation.RequestParam;


/**
 * Handles and retrieves person request
 * 
 * @author Krams at {@link http://krams915@blogspot.com
 */
@Controller
@RequestMapping("/main/creditcard")
public class CreditCardController {

 protected static Logger logger = Logger.getLogger("controller");
 
 @Resource(name="personService")
 private PersonService personService;
 
 @Resource(name="creditCardService")
 private CreditCardService creditCardService;
 
    /**
     * Retrieves the "Add New Credit Card" page
     */
    @RequestMapping(value = "/add", method = RequestMethod.GET)
    public String getAdd(@RequestParam("id") Integer personId, Model model) {
     logger.debug("Received request to show add page");
    
     // Prepare model object
     CreditCard creditCard = new CreditCard();
     creditCard.setPerson(personService.get(personId));
     
     // Add to model
     model.addAttribute("creditCardAttribute", creditCard);

     // This will resolve to /WEB-INF/jsp/add-credit-card.jsp
     return "add-credit-card";
 }
 
    /**
     * Adds a new credit card
     */
    @RequestMapping(value = "/add", method = RequestMethod.POST)
    public String postAdd(@RequestParam("id") Integer personId, 
              @ModelAttribute("creditCardAttribute") CreditCard creditCard) {
  logger.debug("Received request to add new credit card");
  
  // Delegate to service
  creditCardService.add(personId, creditCard);

  // Redirect to url
  return "redirect:/krams/main/record/list";
 }
    
    
    /**
     * Deletes a credit card
     */
    @RequestMapping(value = "/delete", method = RequestMethod.GET)
    public String getDelete(@RequestParam("id") Integer creditCardId) {
     logger.debug("Received request to delete credit card");
    
     // Delegate to service
  creditCardService.delete(creditCardId);

  // Redirect to url
  return "redirect:/krams/main/record/list";
 }
   
    /**
     * Retrieves the "Edit Existing Credit Card" page
     */
    @RequestMapping(value = "/edit", method = RequestMethod.GET)
    public String getEdit(@RequestParam("id") Integer creditCardId, Model model) {
     logger.debug("Received request to show edit page");
     
     // Retrieve credit card by id
     CreditCard existingCreditCard = creditCardService.get(creditCardId);

     // Add to model
     model.addAttribute("creditCardAttribute", existingCreditCard);

     // This will resolve to /WEB-INF/jsp/edit-credit-card.jsp
     return "edit-credit-card";
 }
 
    /**
     * Edits an existing credit card
     */
    @RequestMapping(value = "/edit", method = RequestMethod.POST)
    public String postEdit(@RequestParam("id") Integer creditCardId, 
              @ModelAttribute("creditCardAttribute") CreditCard creditCard) {
  logger.debug("Received request to add new credit card");
  
  // Assign id
  creditCard.setId(creditCardId);
  
  // Delegate to service
  creditCardService.edit(creditCard);

  // Redirect to url
  return "redirect:/krams/main/record/list";
 }
}

View Layer

After discussing the Domain, Service, and Controller layers, we'll now turn our focus to the View layer. Our views are primarily composed of JSP pages. Here are the JSPs:

Show all records


records.jsp
<%@ taglib uri="http://java.sun.com/jsp/jstl/core" prefix="c" %>
<%@ page language="java" contentType="text/html; charset=UTF-8"
    pageEncoding="UTF-8"%>
<!DOCTYPE html PUBLIC "-//W3C//DTD HTML 4.01 Transitional//EN" "http://www.w3.org/TR/html4/loose.dtd">
<html>
<head>
<meta http-equiv="Content-Type" content="text/html; charset=UTF-8">
<title>Insert title here</title>
</head>
<body>
<h1>Records</h1>

<c:url var="editImgUrl" value="/resources/img/edit.png" />
<c:url var="deleteImgUrl" value="/resources/img/delete.png" />
<c:url var="addUrl" value="/krams/main/record/add" />
<table style="border: 1px solid; width: 100%; text-align:center">
 <thead style="background:#d3dce3">
  <tr>
   <th>Id</th>
   <th>First Name</th>
   <th>Last Name</th>
   <th>Money</th>
   <th colspan="2"></th>
   <th>CC Type</th>
   <th>CC Number</th>
   <th colspan="3"></th>
  </tr>
 </thead>
 <tbody style="background:#ccc">
 <c:forEach items="${persons}" var="person">
  <c:url var="editUrl" value="/krams/main/record/edit?id=${person.id}" />
  <c:url var="deleteUrl" value="/krams/main/record/delete?id=${person.id}" />
  
  <c:if test="${!empty person.creditCards}">
   <c:forEach items="${person.creditCards}" var="creditCard">
   <tr>
    <td><c:out value="${person.id}" /></td>
    <td><c:out value="${person.firstName}" /></td>
    <td><c:out value="${person.lastName}" /></td>
    <td><c:out value="${person.money}" /></td>
    <td><a href="${editUrl}"><img src="${editImgUrl}"></img></a></td>
    <td><a href="${deleteUrl}"><img src="${deleteImgUrl}"></img></a></td>
    
    <td><c:out value="${creditCard.type}" /></td>
    <td><c:out value="${creditCard.number}" /></td>
    <c:url var="addCcUrl" value="/krams/main/creditcard/add?id=${person.id}" />
    <c:url var="editCcUrl" value="/krams/main/creditcard/edit?id=${creditCard.id}" />
    <c:url var="deleteCcUrl" value="/krams/main/creditcard/delete?id=${creditCard.id}" />
    <td><a href="${addCcUrl}">+</a></td>
    <td><a href="${editCcUrl}"><img src="${editImgUrl}"></img></a></td>
    <td><a href="${deleteCcUrl}"><img src="${deleteImgUrl}"></img></a></td>
   </tr>
   </c:forEach>
  </c:if>
  
  <c:if test="${empty person.creditCards}">
   <tr>
    <td><c:out value="${person.id}" /></td>
    <td><c:out value="${person.firstName}" /></td>
    <td><c:out value="${person.lastName}" /></td>
    <td><c:out value="${person.money}" /></td>
    <td><a href="${editUrl}"><img src="${editImgUrl}"></img></a></td>
    <td><a href="${deleteUrl}"><img src="${deleteImgUrl}"></img></a></td>
    
    <td>N/A</td>
    <td>N/A</td>
    <c:url var="addCcUrl" value="/krams/main/creditcard/add?id=${person.id}" />
    <td><a href="${addCcUrl}">+</a></td>
    <td></td>
    <td></td>
   </tr>
  </c:if>
  
 </c:forEach>
 </tbody>
</table>

<c:if test="${empty persons}">
 No records found. 
</c:if>

<p><a href="${addUrl}">Create new record</a></p>

</body>
</html>

Add new record


add-record.jsp
<%@ taglib uri="http://java.sun.com/jsp/jstl/core" prefix="c" %>
<%@ taglib uri="http://www.springframework.org/tags/form" prefix="form" %>
<%@ page language="java" contentType="text/html; charset=UTF-8"
    pageEncoding="UTF-8"%>
<!DOCTYPE html PUBLIC "-//W3C//DTD HTML 4.01 Transitional//EN" "http://www.w3.org/TR/html4/loose.dtd">
<html>
<head>
<meta http-equiv="Content-Type" content="text/html; charset=UTF-8">
<title>Insert title here</title>
</head>
<body>

<h1>Create New Record</h1>

<c:url var="saveUrl" value="/krams/main/record/add" />
<form:form modelAttribute="personAttribute" method="POST" action="${saveUrl}">
 <table>
  <tr>
   <td><form:label path="firstName">First Name:</form:label></td>
   <td><form:input path="firstName"/></td>
  </tr>

  <tr>
   <td><form:label path="lastName">Last Name</form:label></td>
   <td><form:input path="lastName"/></td>
  </tr>
  
  <tr>
   <td><form:label path="money">Money</form:label></td>
   <td><form:input path="money"/></td>
  </tr>
 </table>
 
 <input type="submit" value="Save" />
</form:form>

</body>
</html>

Edit existing record


edit-record.jsp
<%@ taglib uri="http://java.sun.com/jsp/jstl/core" prefix="c" %>
<%@ taglib uri="http://www.springframework.org/tags/form" prefix="form" %>
<%@ page language="java" contentType="text/html; charset=UTF-8"
    pageEncoding="UTF-8"%>
<!DOCTYPE html PUBLIC "-//W3C//DTD HTML 4.01 Transitional//EN" "http://www.w3.org/TR/html4/loose.dtd">
<html>
<head>
<meta http-equiv="Content-Type" content="text/html; charset=UTF-8">
<title>Insert title here</title>
</head>
<body>

<h1>Edit Existing Record</h1>

<c:url var="saveUrl" value="/krams/main/record/edit?id=${personAttribute.id}" />
<form:form modelAttribute="personAttribute" method="POST" action="${saveUrl}">
 <table>
  <tr>
   <td><form:label path="id">Id:</form:label></td>
   <td><form:input path="id" disabled="true"/></td>
  </tr>
 
  <tr>
   <td><form:label path="firstName">First Name:</form:label></td>
   <td><form:input path="firstName"/></td>
  </tr>

  <tr>
   <td><form:label path="lastName">Last Name</form:label></td>
   <td><form:input path="lastName"/></td>
  </tr>
  
  <tr>
   <td><form:label path="money">Money</form:label></td>
   <td><form:input path="money"/></td>
  </tr>
 </table>
 
 <input type="submit" value="Save" />
</form:form>

</body>
</html>

Add new credit card


add-credit-card.jsp
<%@ taglib uri="http://java.sun.com/jsp/jstl/core" prefix="c" %>
<%@ taglib uri="http://www.springframework.org/tags/form" prefix="form" %>
<%@ page language="java" contentType="text/html; charset=UTF-8"
    pageEncoding="UTF-8"%>
<!DOCTYPE html PUBLIC "-//W3C//DTD HTML 4.01 Transitional//EN" "http://www.w3.org/TR/html4/loose.dtd">
<html>
<head>
<meta http-equiv="Content-Type" content="text/html; charset=UTF-8">
<title>Insert title here</title>
</head>
<body>

<h1>Add New Credit Card</h1>

<c:url var="saveUrl" value="/krams/main/creditcard/add?id=${personId}" />
<form:form modelAttribute="creditCardAttribute" method="POST" action="${saveUrl}">
 <table>
 
  <tr>
   <td>Person Id:</td>
   <td><input type="text" value="${personId}" disabled="true"/>
  </tr>
  
  <tr>
   <td><form:label path="type">Type:</form:label></td>
   <td><form:input path="type"/></td>
  </tr>

  <tr>
   <td><form:label path="number">Number:</form:label></td>
   <td><form:input path="number"/></td>
  </tr>
 </table>
 
 <input type="submit" value="Save" />
</form:form>

</body>
</html>

Edit existing credit card


edit-credit-card.jsp
<%@ taglib uri="http://java.sun.com/jsp/jstl/core" prefix="c" %>
<%@ taglib uri="http://www.springframework.org/tags/form" prefix="form" %>
<%@ page language="java" contentType="text/html; charset=UTF-8"
    pageEncoding="UTF-8"%>
<!DOCTYPE html PUBLIC "-//W3C//DTD HTML 4.01 Transitional//EN" "http://www.w3.org/TR/html4/loose.dtd">
<html>
<head>
<meta http-equiv="Content-Type" content="text/html; charset=UTF-8">
<title>Insert title here</title>
</head>
<body>

<h1>Edit Existing Credit Card</h1>

<c:url var="saveUrl" value="/krams/main/creditcard/edit?id=${creditCardAttribute.id}" />
<form:form modelAttribute="creditCardAttribute" method="POST" action="${saveUrl}">
 <table>
 
  <tr>
   <td>Person Id:</td>
   <td><input type="text" value="${personId}" disabled="true"/>
  </tr>
  
  <tr>
   <td><form:label path="type">Type:</form:label></td>
   <td><form:input path="type"/></td>
  </tr>

  <tr>
   <td><form:label path="number">Number:</form:label></td>
   <td><form:input path="number"/></td>
  </tr>
 </table>
 
 <input type="submit" value="Save" />
</form:form>

</body>
</html>

Configuration

We have completed the necessary Java classes. Our next step is to declare the necessary configuration files:

web.xml
<?xml version="1.0" encoding="UTF-8"?>
<web-app id="WebApp_ID" version="2.4" xmlns="http://java.sun.com/xml/ns/j2ee" xmlns:xsi="http://www.w3.org/2001/XMLSchema-instance" xsi:schemaLocation="http://java.sun.com/xml/ns/j2ee http://java.sun.com/xml/ns/j2ee/web-app_2_4.xsd">
 
 <servlet>
  <servlet-name>spring</servlet-name>
  <servlet-class>org.springframework.web.servlet.DispatcherServlet</servlet-class>
  <load-on-startup>1</load-on-startup>
 </servlet>
 
 <servlet-mapping>
  <servlet-name>spring</servlet-name>
  <url-pattern>/krams/*</url-pattern>
 </servlet-mapping>

 <listener>
  <listener-class>org.springframework.web.context.ContextLoaderListener</listener-class>
 </listener>
 
</web-app>

spring-servlet.xml
<?xml version="1.0" encoding="UTF-8"?>
<beans xmlns="http://www.springframework.org/schema/beans"
 xmlns:xsi="http://www.w3.org/2001/XMLSchema-instance"
 xmlns:p="http://www.springframework.org/schema/p" 
 xsi:schemaLocation="http://www.springframework.org/schema/beans 
      http://www.springframework.org/schema/beans/spring-beans-3.0.xsd">
 
 <!-- Declare a view resolver -->
 <bean id="viewResolver" class="org.springframework.web.servlet.view.InternalResourceViewResolver" 
      p:prefix="/WEB-INF/jsp/" p:suffix=".jsp" />

</beans>

applicationContext.xml
<?xml version="1.0" encoding="UTF-8"?>
<beans xmlns="http://www.springframework.org/schema/beans"
 xmlns:xsi="http://www.w3.org/2001/XMLSchema-instance" 
 xmlns:context="http://www.springframework.org/schema/context"
 xmlns:mvc="http://www.springframework.org/schema/mvc"
 xsi:schemaLocation="http://www.springframework.org/schema/beans 
      http://www.springframework.org/schema/beans/spring-beans-3.0.xsd
      http://www.springframework.org/schema/context
      http://www.springframework.org/schema/context/spring-context-3.0.xsd
   http://www.springframework.org/schema/mvc 
   http://www.springframework.org/schema/mvc/spring-mvc-3.0.xsd">
 
 <!-- Activates various annotations to be detected in bean classes -->
 <context:annotation-config />
 
 <!-- Scans the classpath for annotated components that will be auto-registered as Spring beans.
  For example @Controller and @Service. Make sure to set the correct base-package-->
 <context:component-scan base-package="org.krams.tutorial" />
 
 <!-- Configures the annotation-driven Spring MVC Controller programming model.
 Note that, with Spring 3.0, this tag works in Servlet MVC only!  -->
 <mvc:annotation-driven /> 
 
 <!-- Load Hibernate related configuration -->
 <import resource="hibernate-context.xml" />
 
</beans>

hibernate-context.xml
<?xml version="1.0" encoding="UTF-8"?>
<beans  xmlns="http://www.springframework.org/schema/beans" 
        xmlns:xsi="http://www.w3.org/2001/XMLSchema-instance"
        xmlns:p="http://www.springframework.org/schema/p" 
        xmlns:tx="http://www.springframework.org/schema/tx"
        xmlns:context="http://www.springframework.org/schema/context"
        xsi:schemaLocation="
   http://www.springframework.org/schema/beans 
   http://www.springframework.org/schema/beans/spring-beans-3.0.xsd
   http://www.springframework.org/schema/tx 
   http://www.springframework.org/schema/tx/spring-tx-3.0.xsd
   http://www.springframework.org/schema/context
   http://www.springframework.org/schema/context/spring-context-3.0.xsd
      ">

 <context:property-placeholder location="/WEB-INF/spring.properties" />
    
    <!-- Enable annotation style of managing transactions -->
 <tx:annotation-driven transaction-manager="transactionManager" /> 
   
    <!-- Declare the Hibernate SessionFactory for retrieving Hibernate sessions -->
    <!-- See http://static.springsource.org/spring/docs/3.0.x/javadoc-api/org/springframework/orm/hibernate3/annotation/AnnotationSessionFactoryBean.html -->        
 <!-- See http://docs.jboss.org/hibernate/stable/core/api/index.html?org/hibernate/SessionFactory.html -->
 <!-- See http://docs.jboss.org/hibernate/stable/core/api/index.html?org/hibernate/Session.html -->
 <bean id="sessionFactory" class="org.springframework.orm.hibernate3.annotation.AnnotationSessionFactoryBean"
     p:dataSource-ref="dataSource"
     p:configLocation="${hibernate.config}"
     p:packagesToScan="org.krams.tutorial"/>
 
 <!-- Declare a datasource that has pooling capabilities-->  
 <bean id="dataSource" class="com.mchange.v2.c3p0.ComboPooledDataSource"
    destroy-method="close"
    p:driverClass="${app.jdbc.driverClassName}"
    p:jdbcUrl="${app.jdbc.url}"
    p:user="${app.jdbc.username}"
    p:password="${app.jdbc.password}"
    p:acquireIncrement="5"
    p:idleConnectionTestPeriod="60"
    p:maxPoolSize="100"
    p:maxStatements="50"
    p:minPoolSize="10" />

 <!-- Declare a transaction manager-->
 <bean id="transactionManager" class="org.springframework.orm.hibernate3.HibernateTransactionManager" 
          p:sessionFactory-ref="sessionFactory" />
  
</beans>

hibernate.cfg.xml
<?xml version="1.0" encoding="UTF-8"?>
<!DOCTYPE hibernate-configuration PUBLIC
  "-//Hibernate/Hibernate Configuration DTD 3.0//EN"
  "http://hibernate.sourceforge.net/hibernate-configuration-3.0.dtd">
  
<hibernate-configuration>
  <session-factory>
   <!-- We're using MySQL database so the dialect needs to MySQL as well-->
    <property name="hibernate.dialect">org.hibernate.dialect.MySQL5InnoDBDialect</property>
    <!-- Enable this to see the SQL statements in the logs-->
    <property name="show_sql">true</property>
    <!-- This will drop our existing database and re-create a new one.
      Existing data will be deleted! -->
    <property name="hbm2ddl.auto">create</property>
  </session-factory>
</hibernate-configuration>

spring.properties
# database properties
app.jdbc.driverClassName=com.mysql.jdbc.Driver
app.jdbc.url=jdbc:mysql://localhost/mydatabase
app.jdbc.username=root
app.jdbc.password=

#hibernate properties
hibernate.config=/WEB-INF/hibernate.cfg.xml

Run the Application


Setup the database

Our application uses MySQL as its database. To run the application, make sure to setup the database first.

To create the database, follow these steps.
1. Open phpmyadmin (or any tool you prefer with)
2. Create a new database named mydatabase
3. Run the application to automatically create the database schema.

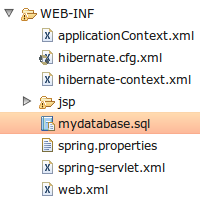
To populate the database with sample data, import the mydatabase.sql SQL script which is located under the WEB-INF folder of the application:


Access the main application

To access the main application, use the following URL:
http://localhost:8080/spring-hibernate-many-to-one-default/krams/main/record/list

You should see the following application:


Conclusion

That's it. We've successfully created a Spring MVC application and implemented a one-to-many association in Hibernate using annotations. We've also discussed issues and solutions when using default settings of @ManyToOne annotation.

Download the project
You can access the project site at Google's Project Hosting at http://code.google.com/p/spring-mvc-hibernate-annotations-integration-tutorial/

You can download the project as a Maven build. Look for the spring-hibernate-many-to-one-default.zip in the Download sections.

You can run the project directly using an embedded server via Maven.
For Tomcat: mvn tomcat:run
For Jetty: mvn jetty:run

If you want to learn more about Spring MVC and integration with other technologies, feel free to read my other tutorials in the Tutorials section.
StumpleUpon DiggIt! Del.icio.us Blinklist Yahoo Furl Technorati Simpy Spurl Reddit Google I'm reading: Spring - Hibernate: Many-To-One Association ~ Twitter FaceBook

Subscribe by reader Subscribe by email Share