Introduction
In this article, we will study how to do file uploads with Spring and jQuery. We will learn how to attach multiple files and use the jQuery-File-Upload plugin to provide a seamless file upload experience.Table of Contents
Part 1: Introduction and Functional SpecsPart 2: Java classes
Part 3: XML configuration
Part 4: HTML form
Part 5: Running the Application
Dependencies
- Spring core 3.1.0.RELEASE
- jQuery-File-Upload
- See pom.xml for details
Github
To access the source code, please visit the project's Github repository (click here)
Functional Specs
Let's define our application's requirements:- Create a simple form where users can upload multiple files
- Users should be able to add an owner name and description for each upload
- Provide an AJAX-like experience
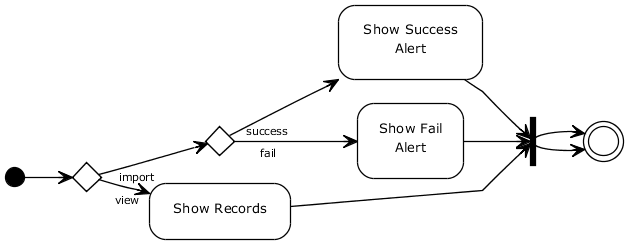
Here's our Use Case diagram:

File Upload Strategy
To achieve an AJAX-like experience we have to resort to a different strategy when uploading and sending form data. Instead of sending all form data in one go, we will upload the file separately (behind the scenes without user intervention).
Here are the steps:
- User fills-in the form's text inputs, i.e owner and description
- User clicks on "Add a file" link. Browsers for a file and attaches it
- Behind the scene, the form uploads the file to the server. The server saves the file and returns the file details, i.e filename and file size
- User clicks on "Upload" button. The form does a POST action to send the form data. But it never sends the file itself. Instead it sends the filename that was saved by the server. The user is tricked into thinking that the file hasn't been uploaded yet.
Screenshots
Let's preview how our application will look like after it has been completed. This is also a good way to clarify further our application's specsThis is the entry page where users can upload files. Users are allowed to attach multiple files.

Upload Form
When attaching multiple files, this is the expected output.

Multiple files attachment
This alert shows whenever files have been successfully uploaded.

Successful upload alert
This alerts shows whenever files have failed to be uploaded.

Form fields cleared alert
Next
In the next section, we will start writing the Java classes. Click here to proceed.|
Share the joy:

|
 Subscribe by reader
 Subscribe by email
Share
Subscribe by email
Share