Note: I suggest reading the following tutorial as well which uses the latest Spring Security 3.1
Spring Security 3.1 - Implement UserDetailsService with Spring Data JPA
Spring Security 3.1 - Implement UserDetailsService with Spring Data JPA
What is Spring Security?
Spring Security is a powerful and highly customizable authentication and access-control framework. It is the de-facto standard for securing Spring-based applications
Spring Security is one of the most mature and widely used Spring projects. Founded in 2003 and actively maintained by SpringSource since, today it is used to secure numerous demanding environments including government agencies, military applications and central banks. It is released under an Apache 2.0 license so you can confidently use it in your projects.
Source: http://static.springsource.org/spring-security/site/
Our first task is to setup our Spring 3 MVC application. We dive directly to the main controller.
MainController
This controller declares two mappings:
/main/admin
/main/common
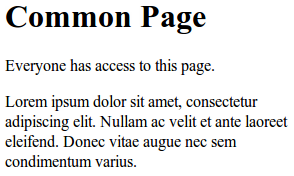
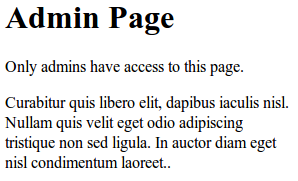
Each handler will resolve to a specific JSP page. The common JSP page is accessible by everyone, while the admin page is accessible only by admins. Right now, everyone has access to these pages because we haven't enabled Spring Security yet.
Next we enable Spring MVC in the web.xml
web.xml
Take note of the URL pattern. When accessing any pages in our MVC application, the host name must be appended with
/kramsFor example, to access the commonpage.jsp, the complete URL should be http://localhost:8080/myapp/krams/main/common
In the web.xml we declared a servlet-name spring. By convention, we must declare a spring-servlet.xml as well.
spring-servlet.xml.
This XML config declares a view resolver. All references to a JSP name in the controllers will map to a corresponding JSP in the /WEB-INF/jsp location.
By convention, we must declare an applicationContext.xml
applicationContext.xml
This XML config declares three beans to activate the Spring 3 MVC programming model.
Our web application is almost done. The final piece is to create the JSP pages. We will create a commonpage.jsp for the common view and adminpage.jsp for the admin view.
commonpage.jsp
adminpage.jsp
Here's a screenshot of these JSP pages:


Our Spring 3 MVC application is now finish!
To access the common page, enter the following URL:
http://localhost:8080/spring-security-integration/krams/main/common
To access the admin page, enter the following URL:
http://localhost:8080/spring-security-integration/krams/main/admin
The best way to learn further is to try the actual application.
Download the project
You can access the project site at Google's Project Hosting at http://code.google.com/p/spring3-security-mvc-integration-tutorial/
You can download the project as a Maven build. Look for the spring-mvc.zip in the Download sections.
You can run the project directly using an embedded server via Maven.
For Tomcat: mvn tomcat:run
For Jetty: mvn jetty:run
Here's Spring Security - MVC Integration Tutorial (Part 2)
|
Share the joy:
|