If you're interested with integrating RabbitMQ instead of an RDBMS, you might want to look at the following tutorial Spring Integration 2: Integrating RabbitMQ and Web Service
What is Spring Integration?
Spring Integration provides an extension of the Spring programming model to support the well-known Enterprise Integration Patterns. It enables lightweight messaging within Spring-based applications and supports integration with external systems via declarative adapters. Those adapters provide a higher-level of abstraction over Spring's support for remoting, messaging, and scheduling. Spring Integration's primary goal is to provide a simple model for building enterprise integration solutions while maintaining the separation of concerns that is essential for producing maintainable, testable code.
Source: Spring Integration 2 Reference
Background
Scenario
A mobile application sends reports as text messages. A receiver application processes these messages and delegates further processing to a publisher. The publisher's responsibility is to save these messages to a database, MySQL.Purpose
Our job is to develop an integration backend that retrieves messages posted by mobile applications. Once the messages have been retrieved, the backend sends the messages to an external web service and logs the response.The whole system is composed of three major systems.
1. A mobile reporting system (3rd party)
2. Integration backend (our system)
3. Web service (3rd party)
The Client
Our client is a small-time computer parts reseller. The reports they send everyday are composed of Sales, Inventory, and Order. To make their data manageable they've decided to enroll in our system. The reports they'll send contains the following details:| Report Type | Details |
|---|---|
| Sales | Branch name, Amount, Remarks |
| Inventory | Branch name, Product name, Beginning inventory, Ending inventory |
| Order | Branch name, Product name, Quantity |
Mobile Reporting System
The mobile reporting system is composed of a mobile application (based on J2ME, Android, and Symbian) for sending Sales, Order, and Inventory reports. And a mobile backend that processes reports by storing them as text messages in a MySQL database.Messages sent by the mobile application follows the following format:
{Unique id};{Branch name};{Keyword};{Data1};{Data2};{Data3…}Example of this format are the following:
1234567;Branch A;SALES;3000.50;Pending approval
1234568;Branch A;INVENTORY;Printer;30;30
1234569;Branch B;ORDER;Keyboard;50
These are plain Strings where the meaning depends on the client's requirements. It's up to the developer to interpret these data. Remember we have no control over the mobile reporting system. All we have is an access to its database.
Here's a screenshot of the database entries:

Integration Backend
Currently the integration backend is made up normal Spring beans. The system works, but our challenge is to make it simpler by using Spring Integration. As mentioned earlier the integration backend's purpose is to retrieve messages from a database and submit the results to a web service.Web Service
The web service is an external service provided by a third party company. All we know about it is its WSDL, serving as the contract of the service. Similar with the mobile reporting system, we have no control over the web service implementation.What's included?
In order to fully test-drive this tutorial, we need all three systems. Providing just the integration backend would be difficult to test the application. Consequently, this tutorial includes the following applications and scripts:1. A MySQL script for recreating the text messages. After all, the integration backend is disconnected from the mobile system. It just needs an access to its database.
2. The integration backend (the main content of this tutorial)
3. A web service provider application based on Spring WS 2.
Development
After a brief review of the systems' background, we know begin the development of the application.The Big Picture
Spring Integration is all about patterns and POJOs (Plain Old Java Objects). So it's important that we see the big picture first before dealing with the details. Below is a graph of the whole integration backend system. The graph is generated using the free SpringSource Tool Suite.
At first glance the system looks complicated. But actually it's quite straightforward. Take a moment to study the graph. Pay attention to where the arrows are pointing at.
Simpler Graphs
To facilitate the understanding of the graph, I've dissected it to simpler ones.The graph below shows that the data's entry point is via the jdbcInbound adapter. Then it passes to chain1. This chain contains a message splitter and a filter for sifting out invalid messages. After chain1, data is passed to chain2. This chain contains a header enricher, a content transformer, and a router which routes messages to appropriate channels.

The graph below is the next step in the flow. The router decides where to route the data next. It basically decides which channel should it send the message it contains. Notice we have four channels here:
rejectedMessageChannel
salesChannel
inventoryChannel
orderChannel

After the data has been routed, each valid messages gets transformed to a Java object. Then it's passed to an aggregator. The aggregator's job is to collect all these messages. Once it has collected them, it sends the message to a web service outbound adapter.
The whole system can be summarized as follows:
JDBC adapter >> Splitter >> Filter >> Transformer >> Router >> Transformer >> Aggregator >> WS adapter
The Finer Details
After a brief overview of the big picture, let's now study the system in-depth.The JDBC Inbound Adapter
 | The inbound JDBC adapter's purpose is to retrieve entries from a database. It can also call an update query to mark those entries that had been retrieved. Once the entries had been retrieved, Spring Integration will wrap the entries as a list of Message objects. |
<jdbc:inbound-channel-adapter id="jdbcInbound"
  query="select * from message where status = 0"
  channel="jdbcChannel" data-source="dataSource"
  update="update message set status=1 where id in (:id)">
  <poller fixed-rate="5000">
   <transactional />
  </poller>
</jdbc:inbound-channel-adapter>
Here we're simply querying the database with "select * from message where status = 0" every 5 milliseconds. If we enabled DEBUG logging, we see the following statements every 5 milliseconds:
EXECUTE SELECT STATEMENT #1
[08:24:33] (JdbcTemplate.java:query:434) Executing SQL query [select * from message where status = 0]
[08:24:33] (AbstractPlatformTransactionManager.java:processCommit:752) Initiating transaction commit

EXECUTE SELECT STATEMENT #2
[08:24:38] (JdbcTemplate.java:query:434) Executing SQL query [select * from message where status = 0]
[08:24:38] (AbstractPlatformTransactionManager.java:processCommit:752) Initiating transaction commit

EXECUTE SELECT STATEMENT #3
[08:24:43] (JdbcTemplate.java:query:434) Executing SQL query [select * from message where status = 0]
[08:24:43] (AbstractPlatformTransactionManager.java:processCommit:752) Initiating transaction commit
Notice how the inbound JDBC adapter delegates its execution via Spring's JDBCTemplate.
Assuming the database contains entries with status = 0, we see the following statements instead:
EXECUTE SELECT STATEMENT
[08:28:03] (JdbcTemplate.java:query:434) Executing SQL query [select * from message where status = 0]
[08:28:03] (ExpressionEvaluatingSqlParameterSourceFactory.java:getValue:136) Resolved expression #root.![id] to [1, 2, 3]

EXECUTE UPDATE STATEMENT
[08:28:03] (JdbcTemplate.java:update:810) Executing prepared SQL update
[08:28:03] (JdbcTemplate.java:execute:569) Executing prepared SQL statement [update message set status=1 where id in (?, ?, ?)]
[08:28:03] (JdbcTemplate.java:doInPreparedStatement:819) SQL update affected 3 rows
After retrieving the entries, the JDBC adapter executes the update SQL statement that simply changes the status to 1:
update message set status=1 where id in (?, ?, ?)
This is important so that when the adapter queries the database, it won't retrieve the same entries again! Otherwise, we'll be in a forever loop.
The Splitter
 | The Splitter's purpose is to split a list of messages returned by the JDBC adapter. We need to split the messages so that we can process each message individually.R Remember each message corresponds to a particular record type. |
<chain input-channel="jdbcChannel" output-channel="filteredChannel">
  <splitter ref="splitterBean"/>
  ...
</chain>

<beans:bean id="splitterBean" class="org.krams.tutorial.si.MessageSplitter" />
We're referencing splitterBean that points to a custom MessageSplitter class:
MessageSplitter.java
package org.krams.tutorial.si;

import java.util.ArrayList;
import org.apache.log4j.Logger;
import org.springframework.integration.Message;
import org.springframework.integration.splitter.AbstractMessageSplitter;

/**
 *  Retrieves the message payload and returns it an array of messages.
 *  For this application, the message payload is retrieved via JDBC
 *
 *  @author Krams at {@link http://krams915@blogspot.com}
 */
public class MessageSplitter extends AbstractMessageSplitter {

 protected static Logger logger = Logger.getLogger("integration");

 @Override
 protected ArrayList<?> splitMessage(Message<?> message) {

  ArrayList<?> messages = (ArrayList<?>) message.getPayload();

  logger.debug("Total messages: " + messages.size());
  for (Object mess: messages) {
   logger.debug(mess.toString());
  }

  return messages;
 }

}
Notice this Splitter implementation extends from a base class AbstractMessageSplitter for providing standard splitting behavior.What is AbstractMessageSplitter?
The API for performing splitting consists of one base class, AbstractMessageSplitter, which is a MessageHandler implementation, encapsulating features which are common to splitters, such as filling in the appropriate message headers CORRELATION_ID, SEQUENCE_SIZE, and SEQUENCE_NUMBER on the messages that are produced. This enables tracking down the messages and the results of their processing (in a typical scenario, these headers would be copied over to the messages that are produced by the various transforming endpoints), and use them, for example, in a Composed Message Processor scenario.
Source: Spring Integration 2 - 5.3 Splitter
Enabling DEBUG logging shows the following output:
SPLITTER BEAN RECEIVES THE MESSAGES
[08:28:03] (AbstractMessageHandler.java:handleMessage:72) splitterBean received message: [Payload=[{id=1, content=1234567;Branch A;SALES;3000.50;Pending approval, status=0, timestamp=2011-03-01 01:00:02.0}, {id=2, content=1234568;Branch A;INVENTORY;Printer;30;10, status=0, timestamp=2011-03-01 01:00:18.0}, {id=3, content=1234569;Branch B;ORDER;Keyboard;50, status=0, timestamp=2011-03-01 01:00:31.0}]][Headers={timestamp=1299371283297, id=644223bd-2fab-4fa6-a7d1-ceee10885c9e}]

SPLIT THE MESSAGES
[08:28:03] (MessageSplitter.java:splitMessage:23) Total messages: 3
[08:28:03] (MessageSplitter.java:splitMessage:25) {id=1, content=1234567;Branch A;SALES;3000.50;Pending approval, status=0, timestamp=2011-03-01 01:00:02.0}
[08:28:03] (MessageSplitter.java:splitMessage:25) {id=2, content=1234568;Branch A;INVENTORY;Printer;30;10, status=0, timestamp=2011-03-01 01:00:18.0}
[08:28:03] (MessageSplitter.java:splitMessage:25) {id=3, content=1234569;Branch B;ORDER;Keyboard;50, status=0, timestamp=2011-03-01 01:00:31.0}
The Filter
 | The Filter's purpose is to sift out invalid messages. These are messages that have invalid keywords. Remember valid keywords are SALES, INVENTORY, and ORDER. Valid messages will be sent to the next flow with a header property valid = true. Invalid ones will be redirected to a discard channel with a header property valid = false. |
<chain input-channel="jdbcChannel" output-channel="filteredChannel">
  ...
  <filter ref="filterBean" method="filter"  discard-channel="rejectedMessagesChannel" />
</chain>

<beans:bean id="filterBean" class="org.krams.tutorial.si.ProductFilter" />
ProductFilter.java
package org.krams.tutorial.si;

import java.util.Map;

import org.apache.log4j.Logger;

/**
 *  Filters messages based on their keyword. If an item is invalid,
 *  it gets dropped from the normal process.
 *  <p>
 *  Valid keywords are SALES, INVENTORY, ORDER
 *
 *  @author Krams at {@link http://krams915@blogspot.com}
 */
public class ProductFilter {

 protected static Logger logger = Logger.getLogger("integration");

 public Boolean filter(Map<?,?> map) {
  logger.debug(map.toString());

  String content = map.get("content").toString();
  String[] contentArray = content.split(";");

  if (contentArray[ApplicationConstants.TYPE_INDEX].equalsIgnoreCase(ApplicationConstants.TYPE_SALES)) {
         return true;
        }

  if (contentArray[ApplicationConstants.TYPE_INDEX].equalsIgnoreCase(ApplicationConstants.TYPE_INVENTORY)) {
   return true;
        }

  if (contentArray[ApplicationConstants.TYPE_INDEX].equalsIgnoreCase(ApplicationConstants.TYPE_ORDER)) {
   return true;
        }

  logger.debug("Invalid keyword found");
  return false;
 }
}
Enabling DEBUG logging shows the following output:
FILTERING
[08:28:03] (ProductFilter.java:filter:20) {id=1, content=1234567;Branch A;SALES;3000.50;Pending approval, status=0, timestamp=2011-03-01 01:00:02.0}

SEND FILTERED MESSAGE TO filteredChannel
[08:28:03] (AbstractMessageChannel.java:preSend:224) preSend on channel 'filteredChannel', message: [Payload={id=1, content=1234567;Branch A;SALES;3000.50;Pending approval, status=0, timestamp=2011-03-01 01:00:02.0}][Headers={timestamp=1299371283305, id=c632378c-3014-4770-8b23-aa6501fcd9e9, correlationId=644223bd-2fab-4fa6-a7d1-ceee10885c9e, sequenceSize=3, sequenceNumber=1}]
The Content Transformer
| The Transformer's purpose is to retrieve the value of "content" key from the Message object. The content value is then converted to a String array. For this application we have two types of transformer: a ContentTransformer and Mapper. We'll discuss first the ContentTransformer |
<chain input-channel="filteredChannel">
  ...
  <transformer ref="contentTransformerBean" method="transform"/>
  ...
</chain>

<beans:bean id="contentTransformerBean" class="org.krams.tutorial.si.ContentTransformer" />
ContentTransformer.java
package org.krams.tutorial.si;

import java.util.Map;

import org.apache.log4j.Logger;

/**
 *  Retrieves the <b>content</b> entry and returns it as an array of Strings.
 *  This assumes the content is delimited by semicolon.
 *
 *  @author Krams at {@link http://krams915@blogspot.com}
 */
public class ContentTransformer {

 protected static Logger logger = Logger.getLogger("integration");
 private static final String CONTENT = "content";
 private static final String DELIMITER = ";";

 public String[] transform(Map<?,?> map) {
  logger.debug("Original data: " + map.toString());

  String content = map.get(CONTENT).toString();
  String[] contentArray = content.split(DELIMITER);

  logger.debug("Tranformed data: " + contentArray);
  return contentArray;
 }
}
Enabling DEBUG logging shows the following output:
BEFORE TRANSFORMATION
[09:10:06] (ContentTransformer.java:transform:20) Original data: {id=1, content=1234567;Branch A;SALES;3000.50;Pending approval, status=0, timestamp=2011-03-01 01:00:02.0}

AFTER TRANSFORMATION
[09:10:06] (ContentTransformer.java:transform:25) Tranformed data: [Ljava.lang.String;@1d0e2c9
The Router
 | The Router's purpose is to redirect each String array to a specific channel. Redirection is based on the keyword found on the String array. For example, a String array containing the SALES keyword will be sent to the salesChannel. |
<chain input-channel="filteredChannel">
  ...
  <router ref="productRouterBean" method="route" />
</chain>

<beans:bean id="productRouterBean" class="org.krams.tutorial.si.ProductRouter" />
ProductRouter.java
package org.krams.tutorial.si;

import org.apache.log4j.Logger;

/**
 *  Routes messages based on their keyword. Invalid entries
 *  are routed to unknownChannel
 *
 *  @author Krams at {@link http://krams915@blogspot.com}
 */
public class ProductRouter {

 protected static Logger logger = Logger.getLogger("integration");

 public String route(String[] contentArray) {

        if (contentArray[ApplicationConstants.TYPE_INDEX].equalsIgnoreCase(ApplicationConstants.TYPE_SALES)) {
      logger.debug("Routing to salesChannel");
         return "salesChannel";

        } else if (contentArray[ApplicationConstants.TYPE_INDEX].equalsIgnoreCase(ApplicationConstants.TYPE_INVENTORY)) {
         logger.debug("Routing to inventoryChannel");
         return "inventoryChannel";

        } else if (contentArray[ApplicationConstants.TYPE_INDEX].equalsIgnoreCase(ApplicationConstants.TYPE_ORDER)) {
         logger.debug("Routing to orderChannel");
         return "orderChannel";

        } else  {
         logger.debug("Routing to unknownChannel");
         return "unknownChannel";
        }
    }
}
Enabling DEBUG logging shows the following output:
ROUTER RECEIVES THE MESSAGE
[09:10:06] (AbstractMessageHandler.java:handleMessage:72) org.springframework.integration.router.MethodInvokingRouter@a2d304 received message: [Payload=[Ljava.lang.String;@1d0e2c9][Headers={timestamp=1299373806045, id=51d72c07-056d-4198-b18b-9b11130c854d, valid=true, correlationId=b6b8244c-1bfd-4101-a552-cb6b853b16ce, sequenceSize=1, sequenceNumber=1}]

ROUTE TO APPROPRIATE CHANNEL
[09:10:06] (ProductRouter.java:route:18) Routing to salesChannel
[09:10:06] (AbstractBeanFactory.java:doGetBean:242) Returning cached instance of singleton bean 'salesChannel'

SEND TO CHANNEL
[09:10:06] (AbstractMessageChannel.java:preSend:224) preSend on channel 'salesChannel', message: [Payload=[Ljava.lang.String;@1d0e2c9][Headers={timestamp=1299373806045, id=51d72c07-056d-4198-b18b-9b11130c854d, valid=true, correlationId=b6b8244c-1bfd-4101-a552-cb6b853b16ce, sequenceSize=1, sequenceNumber=1}]
[09:10:06] (AbstractMessageChannel.java:postSend:237) postSend (sent=true) on channel 'salesChannel', message: [Payload=[Ljava.lang.String;@1d0e2c9][Headers={timestamp=1299373806045, id=51d72c07-056d-4198-b18b-9b11130c854d, valid=true, correlationId=b6b8244c-1bfd-4101-a552-cb6b853b16ce, sequenceSize=1, sequenceNumber=1}]
The Mapper Transformers
| The second set of Transformers' purpose is to map a String array to a Java object. We've declared an interface IMapper and provided three implementations corresponding to each of the recognized keywords. |
<transformer input-channel="salesChannel" ref="salesMapper"
  method="map" output-channel="aggregateChannel" />
<transformer input-channel="inventoryChannel" ref="inventoryMapper"
  method="map" output-channel="aggregateChannel" />
<transformer input-channel="orderChannel" ref="orderMapper"
  method="map" output-channel="aggregateChannel" />

<beans:bean id="salesMapper" class="org.krams.tutorial.si.SalesMapper" />
<beans:bean id="inventoryMapper" class="org.krams.tutorial.si.InventoryMapper" />
<beans:bean id="orderMapper" class="org.krams.tutorial.si.OrderMapper" />
IMapper.java
package org.krams.tutorial.si;

/**
 *  Maps a String array to a Java object
 *
 *  @author Krams at {@link http://krams915@blogspot.com}
 */
public interface IMapper {

 public Object map(String[] content);

}
SalesMapper.java
package org.krams.tutorial.si;

import org.apache.log4j.Logger;
import org.krams.tutorial.oxm.Sales;

/**
 *  Concrete class for mapping sales records
 *
 *  @author Krams at {@link http://krams915@blogspot.com}
 */
public class SalesMapper implements IMapper {

 protected static Logger logger = Logger.getLogger("integration");

 public Object map(String[] content) {
  logger.debug("Mapping content: " + content);

  Sales sales = new Sales();
  sales.setId(content[0]);
  sales.setBranch(content[1]);
  sales.setKeyword(content[2]);
  sales.setAmount(Double.valueOf(content[3]));
  sales.setRemarks(content[4]);

  return sales;
 }
}
Enabling DEBUG logging shows the following output:
PASS THE ORIGINAL MESSAGE TO THE TRANSFORMER
[09:21:34] (AbstractMessageHandler.java:handleMessage:72) org.springframework.integration.transformer.MessageTransformingHandler@1988886 received message: [Payload=[Ljava.lang.String;@134ae32][Headers={timestamp=1299374494031, id=ba6d2e23-a74f-49fe-9025-501e09f050b9, valid=true, correlationId=a8baca05-dc05-4466-b4ce-14b98b729295, sequenceSize=3, sequenceNumber=1}]

TRANSFORMED VALUE
[09:21:34] (SalesMapper.java:map:16) Mapping content: [Ljava.lang.String;@134ae32

SEND THE TRANSFORMED VALUE
[09:21:34] (AbstractReplyProducingMessageHandler.java:sendReplyMessage:157) handler 'org.springframework.integration.transformer.MessageTransformingHandler@1988886' sending reply Message: [Payload=org.krams.tutorial.oxm.Sales@12b4986][Headers={timestamp=1299374494034, id=ea6c97d4-8c11-4cf4-b227-9d5ea9819d4e, valid=true, correlationId=a8baca05-dc05-4466-b4ce-14b98b729295, sequenceSize=3, sequenceNumber=1}]
The Aggregator
 | The Aggregator's purpose is to collect and combine all the splitted and processed messages. At this point the original messages are now Java objects instead of String arrays. Once all the messages had been collected, the aggregator will create an AddListRequest object and assigning all records to it. This AddListRequest object is the one that we'll send to an external web service. |
<aggregator input-channel="aggregateChannel"
  output-channel="wsChannel" ref="productAggregatorBean" method="send"
  release-strategy="productAggregatorBean" release-strategy-method="release"
  correlation-strategy="productAggregatorBean" correlation-strategy-method="correlate"
  send-partial-result-on-expiry="false" />

<beans:bean id="productAggregatorBean" class="org.krams.tutorial.si.ProductAggregator" />
ProductAggregator.java
package org.krams.tutorial.si;

import java.util.List;
import org.apache.log4j.Logger;
import org.krams.tutorial.oxm.AddListRequest;
import org.krams.tutorial.oxm.Entity;
import org.krams.tutorial.oxm.Inventory;
import org.krams.tutorial.oxm.Order;
import org.krams.tutorial.oxm.Record;
import org.krams.tutorial.oxm.Sales;
import org.springframework.integration.Message;

/**
 *  Consolidates all messages before sending them to the next
 *  process. In our case, the next process is a web service call.
 *  <p>
 *  This aggregator has the following behavior:
 *  <pre>
 *  1. Correlates messages based on the correlation id.
 *  The correlation id is auto-generated by Spring.
 *
 *  2. Messages are released once all the total messages have reached
 *  the total sequence size. The sequence size is  auto-generated by Spring.
 *
 *  3. Once released, the messages are added to a Record instance which
 *  is added to an instance of AddListRequest. This AddListRequest is the final
 *  message we send to the web service. JAXB will marshall this object to XML
 *  before sending to an external web service.
 *  </pre>
 *  @author Krams at {@link http://krams915@blogspot.com}
 */
public class ProductAggregator {

 protected static Logger logger = Logger.getLogger("integration");

 @SuppressWarnings("unchecked")
 public AddListRequest  send(List<Message> reqlist) {
  logger.debug("Total messages to send: " + reqlist.size());

  AddListRequest request = new AddListRequest();

  for (Message mess: reqlist) {
   // Verify first if record is valid. A filter is run for each record
   // Invalid records have the property valid = false
   if ( Boolean.valueOf(mess.getHeaders().get("valid").toString()) ) {
    Record record = new Record();
    Entity entity = (Entity) mess.getPayload();

    if ( entity.getKeyword().equals(ApplicationConstants.TYPE_SALES)) {
     record.setSales((Sales) mess.getPayload());
     request.getRecord().add(record);
     logger.debug("Added sales");
    }

    if ( entity.getKeyword().equals(ApplicationConstants.TYPE_INVENTORY)) {
     record.setInventory((Inventory) mess.getPayload());
     request.getRecord().add(record);
     logger.debug("Added inventory");
    }

    if ( entity.getKeyword().equals(ApplicationConstants.TYPE_ORDER)) {
     record.setOrder((Order) mess.getPayload());
     request.getRecord().add(record);
     logger.debug("Added order");
    }
   }
  }

  return request;
 }

 public boolean release(List<Message<?>> messages) {
  logger.debug("Message size: " + messages.size());
  logger.debug("Sequence size: " + messages.get(0).getHeaders().getSequenceSize());

  if (messages.size() == messages.get(0).getHeaders().getSequenceSize()) {
   logger.debug("Now releasing ...");
   return true;
  }
     logger.debug("Pending release ...");
     return false;
   }

 public String correlate(Message<?> message) {
  logger.debug("Correlate by: " + message.getHeaders().getCorrelationId().toString());
  return message.getHeaders().getCorrelationId().toString();
 }
}
Enabling DEBUG logging shows the following output:
MESSAGE #1
09:21:34] (ProductAggregator.java:correlate:85) Correlate by: a8baca05-dc05-4466-b4ce-14b98b729295
09:21:34] (ProductAggregator.java:release:73) Message size: 1
09:21:34] (ProductAggregator.java:release:74) Sequence size: 3
09:21:34] (ProductAggregator.java:release:80) Pending release ...

MESSAGE #2
09:21:34] (ProductAggregator.java:correlate:85) Correlate by: a8baca05-dc05-4466-b4ce-14b98b729295
09:21:34] (ProductAggregator.java:release:73) Message size: 2
09:21:34] (ProductAggregator.java:release:74) Sequence size: 3
09:21:34] (ProductAggregator.java:release:80) Pending release ..


MESSAGE #3
09:21:34] (ProductAggregator.java:correlate:85) Correlate by: a8baca05-dc05-4466-b4ce-14b98b729295
09:21:34] (ProductAggregator.java:release:73) Message size: 3
09:21:34] (ProductAggregator.java:release:74) Sequence size: 3
09:21:34] (ProductAggregator.java:release:77) Now releasing ...
09:21:34] (CorrelatingMessageHandler.java:completeGroup:303) Completing group with correlationKey [a8baca05-dc05-4466-b4ce-14b98b729295]
09:21:34] (ProductAggregator.java:send:38) Total messages to send: 3
09:21:34] (ProductAggregator.java:send:52) Added sales
09:21:34] (ProductAggregator.java:send:64) Added order
09:21:34] (ProductAggregator.java:send:58) Added inventory
09:21:34] (AbstractMessageChannel.java:preSend:224) preSend on channel 'wsChannel', message: [Payload=org.krams.tutorial.oxm.AddListRequest@17e53c9][Headers={timestamp=1299374494066, id=031604fb-5efa-4187-9ae8-d5edba29c1ce, valid=true, correlationId=a8baca05-dc05-4466-b4ce-14b98b729295}]
The Outbound Web Service Adapter
 | The outbound WS adapter's purpose is to make a web service call. Before sending the message, the adapter will first marshall the objects using JAXB. After sending, it waits for a reply. The reply is then unmarshalled as an AddListResponse object. |
<ws:outbound-gateway id="marshallingGateway"
  request-channel="wsChannel" uri="http://localhost:8080/spring-ws-si/krams/ws"
  marshaller="jaxbMarshaller" unmarshaller="jaxbMarshaller"
  reply-channel="replyChannel" />
Enabling DEBUG logging shows the following output:
CREATE AN HTTP CONNECTION
[09:21:34] (WebServiceAccessor.java:createConnection:110) Opening [org.springframework.ws.transport.http.HttpUrlConnection@1497b1] to [http://localhost:8080/spring-ws-si/krams/ws]

SEND THE REQUEST
[09:21:34] (WebServiceTemplate.java:sendRequest:584) Sent request [SaajSoapMessage {http://krams915.blogspot.com/ws/schema/oss}addListRequest]

RECEIVE THE REPLY
[09:21:34] (WebServiceTemplate.java:logResponse:642) Received response [SaajSoapMessage {http://krams915.blogspot.com/ws/schema/oss}addListResponse] for request [SaajSoapMessage {http://krams915.blogspot.com/ws/schema/oss}addListRequest]
To verify if the integration backend has really sent the message, let's access our web service's front-end by visiting the following URL:
http://localhost:8080/spring-ws-si/krams/main/records
Here's a screenshot of the results:

It's a success! We've managed to submit the messages using Spring Integration.
Remarks about the Web Service
In order for the web service to be successful, you need to declare a JAXB Marshaller as follows:
<bean id="jaxbMarshaller" class="org.springframework.oxm.jaxb.Jaxb2Marshaller"
  p:contextPath="org.krams.tutorial.oxm" />
Also, you need to generate the Java proxy classes (or JAX-WS portable artifacts) based on the web service's WSDL. For this tutorial, I've included the artifacts already under the package org.krams.tutorial.oxm

If you need to learn how to generate such artifacts from scratch, please visit the following tutorial: Spring WS - MVC: Implementing a Client Tutorial
The Whole Configuration
Let's post the whole configuration file:spring-integration-context.xml
<?xml version="1.0" encoding="UTF-8"?>
<beans:beans
 xmlns="http://www.springframework.org/schema/integration"
 xmlns:beans="http://www.springframework.org/schema/beans"
 xmlns:xsi="http://www.w3.org/2001/XMLSchema-instance"
 xmlns:p="http://www.springframework.org/schema/p"
 xmlns:jdbc="http://www.springframework.org/schema/integration/jdbc"
 xmlns:ws="http://www.springframework.org/schema/integration/ws"
 xmlns:stream="http://www.springframework.org/schema/integration/stream"
 xsi:schemaLocation="http://www.springframework.org/schema/beans
      http://www.springframework.org/schema/beans/spring-beans-3.0.xsd
   http://www.springframework.org/schema/integration
   http://www.springframework.org/schema/integration/spring-integration-2.0.xsd
   http://www.springframework.org/schema/integration/jdbc
   http://www.springframework.org/schema/integration/jdbc/spring-integration-jdbc-2.0.xsd
   http://www.springframework.org/schema/integration/ws
            http://www.springframework.org/schema/integration/ws/spring-integration-ws-2.0.xsd
            http://www.springframework.org/schema/integration/stream
            http://www.springframework.org/schema/integration/stream/spring-integration-stream-2.0.xsd">

 <beans:bean id="splitterBean" class="org.krams.tutorial.si.MessageSplitter" />
 <beans:bean id="contentTransformerBean" class="org.krams.tutorial.si.ContentTransformer" />
 <beans:bean id="productRouterBean" class="org.krams.tutorial.si.ProductRouter" />
 <beans:bean id="filterBean" class="org.krams.tutorial.si.ProductFilter" />
 <beans:bean id="productAggregatorBean" class="org.krams.tutorial.si.ProductAggregator" />
 <beans:bean id="salesMapper" class="org.krams.tutorial.si.SalesMapper" />
 <beans:bean id="inventoryMapper" class="org.krams.tutorial.si.InventoryMapper" />
 <beans:bean id="orderMapper" class="org.krams.tutorial.si.OrderMapper" />

 <jdbc:inbound-channel-adapter
  query="select * from message where status = 0"
  channel="jdbcChannel" data-source="dataSource"
  update="update message set status=1 where id in (:id)">
  <poller fixed-rate="5000">
   <transactional />
  </poller>
 </jdbc:inbound-channel-adapter>

 <channel id="jdbcChannel">
  <interceptors>
   <wire-tap channel="logger" />
  </interceptors>
 </channel>

 <logging-channel-adapter id="logger" level="ERROR" />

 <chain input-channel="jdbcChannel" output-channel="filteredChannel">
  <splitter ref="splitterBean"/>
  <filter ref="filterBean" method="filter"  discard-channel="rejectedMessagesChannel" />
 </chain>

 <publish-subscribe-channel id="rejectedMessagesChannel" />

 <header-enricher input-channel="rejectedMessagesChannel" output-channel="aggregateChannel">
  <header name="valid" value="false" />
 </header-enricher>

 <jdbc:outbound-channel-adapter
  query="update message set status=-1 where id in (:payload[id])"
  data-source="dataSource" channel="rejectedMessagesChannel" />

 <channel id="filteredChannel">
  <queue capacity="10" />
 </channel>

 <chain input-channel="filteredChannel">
  <header-enricher>
   <header name="valid" value="true" />
  </header-enricher>
  <transformer ref="contentTransformerBean" method="transform"/>
  <router ref="productRouterBean" method="route" />
  </chain>

 <channel id="salesChannel">
  <queue capacity="10" />
 </channel>

 <channel id="inventoryChannel">
  <queue capacity="10" />
 </channel>

 <channel id="orderChannel">
  <queue capacity="10" />
 </channel>

 <channel id="unknownChannel">
  <interceptors>
   <wire-tap channel="logger" />
  </interceptors>
 </channel>

 <transformer input-channel="salesChannel" ref="salesMapper"
  method="map" output-channel="aggregateChannel" />
 <transformer input-channel="inventoryChannel" ref="inventoryMapper"
  method="map" output-channel="aggregateChannel" />
 <transformer input-channel="orderChannel" ref="orderMapper"
  method="map" output-channel="aggregateChannel" />

 <channel id="aggregateChannel">
  <queue capacity="10" />
 </channel>

 <aggregator input-channel="aggregateChannel"
  output-channel="wsChannel" ref="productAggregatorBean" method="send"
  release-strategy="productAggregatorBean" release-strategy-method="release"
  correlation-strategy="productAggregatorBean" correlation-strategy-method="correlate"
  send-partial-result-on-expiry="false" />

 <channel id="wsChannel">
  <queue capacity="10" />
 </channel>

 <ws:outbound-gateway id="marshallingGateway"
  request-channel="wsChannel" uri="http://localhost:8080/spring-ws-si/krams/ws"
  marshaller="jaxbMarshaller" unmarshaller="jaxbMarshaller"
  reply-channel="replyChannel" />

 <stream:stdout-channel-adapter id="replyChannel" />

 <poller id="poller" default="true" fixed-rate="1000" />

</beans:beans>
Run the Application
Create the mobile database
To run the application make sure you've setup the database first. The mobile database uses MySQL.To create the database, follow these steps.
1. Open phpmyadmin (or any tool you prefer with)
2. Create a new database named messages
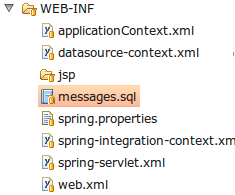
3. Import the messages.sql SQL script which is located in the WEB-INF folder of the tutorial application
Run the web service
To run the web service I use a new instance of Tomcat under port 8080. If you prefer to use a different port, make sure to modify the corresponding URI web service entry in the tutorial application.<ws:outbound-gateway id="marshallingGateway" request-channel="wsChannel" uri="http://localhost:8080/spring-ws-si/krams/ws" marshaller="jaxbMarshaller" unmarshaller="jaxbMarshaller" reply-channel="replyChannel" />
If you need to test the web service, I suggest using soapUI. The URI to the web service is:
http://localhost:8080/spring-ws-si/krams/ws
With soapUI you can send the following XML document to test the service:
<?xml version="1.0" encoding="UTF-8"?>
<soapenv:Envelope xmlns:soapenv="http://schemas.xmlsoap.org/soap/envelope/" xmlns:oss="http://krams915.blogspot.com/ws/schema/oss">
   <soapenv:Header/>
   <soapenv:Body>
      <oss:addListRequest>
         <oss:record>
            <oss:sales>
               <oss:id>1234567</oss:id>
               <oss:keyword>SALES</oss:keyword>
               <oss:branch>Branch A</oss:branch>
               <oss:amount>3000.50</oss:amount>
               <oss:remarks>Pending approval</oss:remarks>
            </oss:sales>
         </oss:record>
         <oss:record>
            <oss:inventory>
               <oss:id>1234568</oss:id>
               <oss:keyword>INVENTORY</oss:keyword>
               <oss:branch>Branch A</oss:branch>
               <oss:product>Printer</oss:product>
               <oss:beginning>30</oss:beginning>
               <oss:ending>10</oss:ending>
            </oss:inventory>
         </oss:record>
         <oss:record>
            <oss:order>
               <oss:id>1234569</oss:id>
               <oss:keyword>ORDER</oss:keyword>
               <oss:branch>Branch B</oss:branch>
               <oss:product>Keyboard</oss:product>
               <oss:quantity>50</oss:quantity>
            </oss:order>
         </oss:record>
      </oss:addListRequest>
   </soapenv:Body>
</soapenv:Envelope>
Since this tutorial is about Spring Integration, I will not discuss in detail how we've implemented the web service. Anyway with Spring Integration all that matters is we know the WSDL contract because more than likely we're relying on a third-party web service. If you need to learn how to create a web service provider and client from scratch, please check the Tutorials section. Or start with the following blog: Spring WS 2 and Spring 3 MVC Integration Tutorial
Run the integration backend
To run the integration backend I use another instance of Tomcat under port 8081. When you run the application, it will run behind the scenes. To see what's happening behind the hood, I suggest to run the application within Eclipse or via SpringSource Tool Suite. Alternatively change the logger properties to change the log directory.Remarks
Certainly the system can be improved and optimized. Furthermore unit and integration tests are either missing or incomplete. Exception catching is quite at its infancy still. However these are left out for the purpose of simplifying the tutorial.
The integration backend has been setup so that we can easily add Spring MVC support. You might notice some extra beans in the configuration file pertaining to MVC.
Issue with Filters
Also there's an issue about Filter's not modifying the sequence size after an invalid message has been dropped. This issue is only worrisome if our Aggregator's Release Strategy relies on the header's sequence size. Unfortunately, that's exactly our Release Strategy. As a workaround we have to pass the dropped messages to the Aggregator for the purpose of completing the sequence size as suggested by Mark Fisher. For more information, see the following post: Filter: Sequence Size is Not Modified.
Restrict the Queries
Currently the JDBC inbound adapter is setup so that it will retrieve all ready messages in the database. That means if we have 1 million records, all of them will be retrieved and 1 million records will be sent to the web service. We might want to limit the number of queries made from the JDBC adapter to manage the requests we send to the web service.
Conclusion
That's it. We've managed to build a simple integration backend using Spring Integration 2. We've successfully integrated data from a mobile reporting database to a third-party web service. All we did is declare a couple of POJOs and simple configuration. Using SpringSource Tool Suite, we're able to visualize the flow of the system. In fact we can even re-arrange them on the graph if needed.Download the project
You can access the project site at Google's Project Hosting at http://code.google.com/p/spring-integration-2-tutorials/
You can download the project as a Maven build. Look for the spring-si-jdbc-ws.zip in the Download sections.
For the SQL script, click here: messages.sql
For the web service, click here: spring-ws-si.zip
You can run the project directly using an embedded server via Maven.
For Tomcat: mvn tomcat:run
For Jetty: mvn jetty:run
If you want to learn more about Spring MVC and integration with other technologies, feel free to read my other tutorials in the Tutorials section.
|
Share the joy:

|
 Subscribe by reader
 Subscribe by email
Share
Subscribe by email
Share