Tuesday, December 28, 2010

Spring Security - MVC: Querying the SessionRegistry

In this tutorial we will build a Spring MVC 3 application secured by Spring Security 3. We will explore how to retrieve currently logged-in users using the SessionRegistry. We will also explore how to retrieve their session information. We will focus on simple configuration. Our users will be authenticated based on Spring's built-in in-memory user-service. This tutorial will build on top of the Spring Security 3 - MVC: Using a Simple User-Service Tutorial because the only difference is mainly XML configuration. It's highly recommended that you read that first!

What is SessionRegistry?
Maintains a registry of SessionInformation instances.

Source: Spring Security 3 API for SessionRegistry
What is SessionInformation?
Represents a record of a session within the Spring Security framework.

This is primarily used for concurrent session support.

Source: Spring Security 3 API for SessionInformation
We begin by inquiring how to query the SessionRegistry. A search on Spring Security Reference 3 gives us the following information:
Setting up concurrency-control, either through the namespace or using plain beans has the useful side effect of providing you with a reference to the SessionRegistry which you can use directly within your application ...

The getAllPrincipals() method supplies you with a list of the currently authenticated users. You can list a user's sessions by calling the getAllSessions(Object principal, boolean includeExpiredSessions) method, which returns a list of SessionInformation objects. You can also expire a user's session by calling expireNow() on a SessionInformation instance.

Source: 11.3.1 Querying the SessionRegistry for currently authenticated users and their sessions
Based on this reference we need to setup the concurrency control to access the SessionRegistry.

Here's what we need to do:

1. "To use concurrent session support, you'll need to add the following to web.xml"

2. "In addition, you will need to add the ConcurrentSessionFilter to your FilterChainProxy."

We add this in the http tag

3. "The ConcurrentSessionFilter requires two properties, sessionRegistry, which generally points to an instance of SessionRegistryImpl, and expiredUrl, which points to the page to display when a session has expired.".

We add the concurrencyFilter bean and sessionRegistry bean.

4. "Authentication by mechanisms which perform a redirect after authenticating (such as form-login) will not be detected by SessionManagementFilter, as the filter will not be invoked during the authenticating request. Session-management functionality has to be handled separately in these cases."

This means we can not use the following form-login tag anymore

5. This means we set the auto-config property to false:

6. Because we disabled auto-config and removed the form-login tag, we must manually assign an AuthenticationEntryPoint:

7. And because we don't have an option to set the default success url, we must add our own handler:

8. And because we don't have an option to set the default failure url, we must add our own handler as well:

9. To activate these handlers, we need to assign them to an AuthenticationFilter:

10. The AuthenticationFilter references an authenticationManager. We are required to set this as an alias:

11. We need to replace the default AuthenticationFilter with our customized filter. We do this by adding it to the FilterChainProxy

12. Define a concrete concurrent control strategy (after all, this is what we really need to activate):

We're done with the steps.

Let's now examine our final Spring XML configurations. Remember we're still dealing with a Spring MVC application.

web.xml

spring-security.xml

spring-servlet.xml

applicationContext.xml

To test this configuration, we create a JSP that displays the a list of currently authenticated users along with their associated details.

To serve this JSP, we add a third request handler in our existing primary controller.

MainController

Notice we have injected the SessionRegistry:

To access all logged-in users, we called the following method:
sessionRegistry.getAllPrincipals()
To access all sessions of the current user, we use the following:
sessionRegistry.getAllSessions()
When we run this application, the logs show the following:
[DEBUG] Received request to show users page
[DEBUG] Total logged-in users: 2
[DEBUG] List of logged-in users: 
[DEBUG] org.springframework.security.core.userdetails.User@31a92e: Username: jane; Password: [PROTECTED]; Enabled: true; AccountNonExpired: true; credentialsNonExpired: true; AccountNonLocked: true; Granted Authorities: ROLE_USER
[DEBUG] org.springframework.security.core.userdetails.User@31dd0b: Username: john; Password: [PROTECTED]; Enabled: true; AccountNonExpired: true; credentialsNonExpired: true; AccountNonLocked: true; Granted Authorities: ROLE_ADMIN,ROLE_USER
[DEBUG] Total sessions including expired ones: 1
[DEBUG] Total sessions: 1
And here's the actual JSP page:
To access the users page, enter the following URL:
http://localhost:8080/spring-security-sessionregistry/krams/main/users
That's it. We've managed to setup a working Spring MVC 3 application that's secured by Spring Security. We've managed to enable concurrent session control and access session information of all currently authenticated users. We've just touched the surface of concurrent session control, specifically SessionRegistry.

The best way to learn further is to try the actual application.

Download the project
You can access the project site at Google's Project Hosting at http://code.google.com/p/spring3-security-mvc-integration-tutorial/

You can download the project as a Maven build. Look for the spring-security-sessionregistry.zip in the Download sections.

You can run the project directly using an embedded server via Maven.
For Tomcat: mvn tomcat:run
For Jetty: mvn jetty:run
StumpleUpon DiggIt! Del.icio.us Blinklist Yahoo Furl Technorati Simpy Spurl Reddit Google I'm reading: Spring Security - MVC: Querying the SessionRegistry ~ Twitter FaceBook

Subscribe by reader Subscribe by email Share

Spring Security 3 - MVC: Using Native Expression-Based Annotation Tutorial

In this tutorial we will build a simple Spring MVC 3 application and provide security using Spring Security 3. We will use Spring Security's native, expression-based annotation to secure parts of our application. Our users will be authenticated based on Spring's built-in in-memory user-service. This tutorial is exactly similar with Spring Security 3 - MVC: Using @Secured Annotation Tutorial. The main difference is the type of annotations they use.

What is Spring Security?
Spring Security is a powerful and highly customizable authentication and access-control framework. It is the de-facto standard for securing Spring-based applications

Spring Security is one of the most mature and widely used Spring projects. Founded in 2003 and actively maintained by SpringSource since, today it is used to secure numerous demanding environments including government agencies, military applications and central banks. It is released under an Apache 2.0 license so you can confidently use it in your projects.

Source: Spring Security
What is Spring Security's native, expression-based annotation?
From 3.0 you can also make use of new expression-based annotations.

Source: Spring Security 3.1 Reference 2.4 Method Security

Spring Security 3.0 introduced the ability to use Spring EL expressions as an authorization mechanism in addition to the simple use of configuration attributes and access-decision voters which have seen before. Expression-based access control is built on the same architecture but allows complicated boolean logic to be encapsulated in a single expression

Source: Spring Security 3.1 Reference 15. Expression-Based Access Control

There are four annotations which support expression attributes to allow pre and post-invocation authorization checks and also to support filtering of submitted collection arguments or return values. They are @PreAuthorize, @PreFilter, @PostAuthorize and @PostFilter. Their use is enabled through the global-method-security namespace element

Source: Spring Security 3.1 Reference 15.3. Method Security Expressions
These annotations allow you to put restrictions in your methods. For example, you can authorize a get() method to be accessible by all registered users. But for the edit() method, you can mark it be accessible by admins only. What's the difference between these annotations and the @Secured? These expression-based annotations allow you to setup complicated logic that's not possible with @Secured alone.

For example, we can mark a method to be accessible only if a certain condition exist:

This expression means allow this method to be accessible only when the person's id is equal to the number 3. It doesn't matter if you're admin or regular user. As long as the id is equal to 3, you're good to go. We'll explore this feature more in our upcoming tutorials.

Let's go back to the main purpose of this tutorial that is to create a Spring MVC application with Spring Security integrated using the native, expression-based annotations. For this matter, we'll focus on the @PreAuthorize because of its similarity with the @Secured.

We'll build first the Spring MVC part of our application, then add Spring Security. Our application has an admin and common pages. It also has a view to show all persons. Only admins can edit a person's record.

Let's declare our primary controller first.

MainController

This controller declares two mappings:
/main/common - any registered user can access this page
/main/admin - only admins can access this page
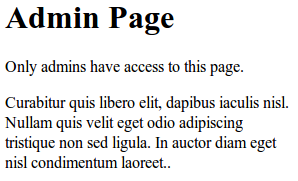
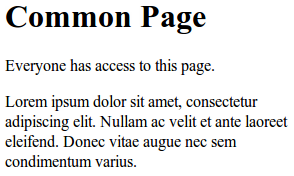
Each mapping will resolve to a specific JSP page. The common JSP page is accessible by everyone, while the admin page is accessible only by admins. Right now, everyone has access to these pages because we haven't enabled Spring Security yet.

Notice we've annotated each method with @PreAuthorize annotation. For the getAdminPage(), we put
@PreAuthorize("hasAuthority('ROLE_ADMIN')")
and for the getCommonPage(), we put
@PreAuthorize("hasAuthority('ROLE_USER')")
. Once we activated Spring Security these annotations will take effect.

Here are the JSP pages:

commonpage.jsp


adminpage.jsp


We've finished setting-up the primary controller and the associated JSP views. Now, we add the required XML configurations to enable Spring MVC and Spring Security at the same time.

We start by adding the web.xml:

web.xml

Notice the url-patterns for the DelegatingFilterProxy and DispatcherServlet. Spring Security is placed at the root-path
/*
Whereas, Spring MVC is placed at a sub-path
/krams/*

We also referenced two important XML configuration files:
spring-security.xml 
applicationContext.xml

spring-security.xml contains configuration related to Spring Security.

spring-security.xml

The elements are self-documenting. If you're using an IDE, like Eclipse or STS, try pointing your mouse to any of these elements and you will see a short description of the element.

Notice that the bulk of the security configuration is inside the http element. Here's what we observe:

1. We enabled @PreAuthorize, @PreFilter, @PostAuthorize and @PostFilter annotations by adding the global-method-security tag:

2. We declared the denied page URL in the
access-denied-page="/krams/auth/denied"
3. We declared the login URL
login-page="/krams/auth/login"
4. We declared the login failure URL
authentication-failure-url="/krams/auth/login?error=true"
5. We declared the URL where the user will be redirected if he logs out
logout-success-url="/krams/auth/login"
6. We declared the logout URL
logout-url="/krams/auth/logout"
7. We declared a default authentication-manager that references an in-memory user-service

8. We declared an in-memory user-service:

This basically declares two users with corresponding passwords and authorities. This user-service is a good way to prototype and test a Spring Security application quickly.

9. We also declared an Md5 password encoder:

When a user enters his password, it's plain string. The password we have in our database (in this case, an in-memory lists) is Md5 encoded. In order for Spring to match the passwords, it's need to encode the plain string to Md5. Once it has been encoded, then it can compare passwords.

Compare this configuration with the one declared in Spring Security 3 - MVC: Using a Simple User-Service Tutorial. Our current configuration is missing the following declaration:

We don't need to declare those intercept-urls anymore because we've already annotated the methods that corresponds to those URLs. You can actually mix them if you need to.

Now we need to create a special controller that handles the login and logout requests.

LoginLogoutController

This controller declares two mappings:
/auth/login - shows the login page
/auth/denied - shows the denied access page
Each mapping will resolve to a specific JSP page.

Here are the JSP pages:

loginpage.jsp


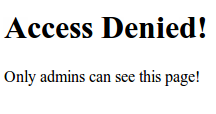
deniedpage.jsp


That's it. We got a working Spring MVC 3 application that's secured by Spring Security. We've managed to build a simple and quick Spring Security configuration.

To access the common page, enter the following URL:
http://localhost:8080/spring-security-annotation-native/krams/main/common
To access the admin page, enter the following URL:
http://localhost:8080/spring-security-annotation-native/krams/main/admin
To login, enter the following URL:
http://localhost:8080/spring-security-annotation-native/krams/auth/login
To logout, enter the following URL:
http://localhost:8080/spring-security-annotation-native/krams/auth/logout
But there's more! Notice we annotated the methods from our controller. What will happen if we annotate the methods of our services instead?

To explore this inquiry, we will provide a hypothetical business scenario. Our client needs to view a list of persons. All registered users can view this list, but only admins can edit it.

We start by declaring a controller.

PersonController


In this controller we have three mappings:
/main - retrieve all persons
/main/edit/{id} - (GET) retrieve and edit a person by his id 
/main/edit/{id} - (POST) save a person based on his id
Notice we have two /main/edit/{id}. How does our controller know which one to call? The controller's @RequestMapping doesn't just rely on the mapping value but it also uses the method type. In our case, it's either POST or GET. The GET method is used when we retrieve a page; whereas, the POST method is used when we're submitting a form. For more info, please check the following blog from SpringSource Annotated Web MVC Controllers in Spring 2.5.

Also, we're using a special identifier in the mappings. We have declared a {id} in the path, and referenced that as @PathVariable in the method parameter. This is a URI template, one of the RESTful features of Spring 3 MVC.

What is a URI template?
A URI template is a URI-like string, containing one or more variable names. When these variables are substituted for values, the template becomes a URI. For more information, see the proposed RFC.

Source: REST in Spring 3: @MVC
For a thorough description of this subject, please visit the blog from SpringSourceREST in Spring 3: @MVC

It's worth noting that we did not annotate this controller with @Secured annotation.

Let's examine the associated JSP view for each mappings.

personspage.jsp

This is referenced by the mapping /persons.

To access the persons page, type the following URL in the browser:
http://localhost:8080/spring-security-annotation-native/krams/persons

editpage.jsp

This is referenced by the mapping /persons/edit/{id} (GET)

To access the edit page, we need to manually type the following URL in the browser:
http://localhost:8080/spring-security-annotation-native/krams/persons/edit/2
Just make sure to change the number to match the id that you want to edit.

Now let's define our service. Remember we referenced a PersonService in the PersonController.

PersonService

Pay attention to the methods. We've annotated the methods with @PreAuthorize.

getAll() and get() has been assigned with ROLE_USER. This means all registered users can access these methods.

edit() has been assigned with ROLE_ADMIN. This means only admins can access this method.

If you need to test these methods, try logging-in as john (password is admin) and as jane (password is user). Both users can view the list of persons. Both users can access the edit page. But only john can do a successful edit, while jane will get the following message
HTTP Status 405 - Request method 'POST not supported'

The best way to learn further is to try the actual application.

Download the project
You can access the project site at Google's Project Hosting at http://code.google.com/p/spring3-security-mvc-integration-tutorial/

You can download the project as a Maven build. Look for the spring-security-annotation-native.zip in the Download sections.

You can run the project directly using an embedded server via Maven.
For Tomcat: mvn tomcat:run
For Jetty: mvn jetty:run
StumpleUpon DiggIt! Del.icio.us Blinklist Yahoo Furl Technorati Simpy Spurl Reddit Google I'm reading: Spring Security 3 - MVC: Using Native Expression-Based Annotation Tutorial ~ Twitter FaceBook

Subscribe by reader Subscribe by email Share

Spring Security 3 - MVC: Using @Secured Annotation Tutorial

In this tutorial we will build a simple Spring MVC 3 application and provide security using Spring Security 3. We will use @Secured annotation to secure parts of our application. Our users will be authenticated based on Spring's built-in in-memory user-service.

What is Spring Security?
Spring Security is a powerful and highly customizable authentication and access-control framework. It is the de-facto standard for securing Spring-based applications

Spring Security is one of the most mature and widely used Spring projects. Founded in 2003 and actively maintained by SpringSource since, today it is used to secure numerous demanding environments including government agencies, military applications and central banks. It is released under an Apache 2.0 license so you can confidently use it in your projects.

Source: Spring Security
What is @Secured annotation?
From version 2.0 onwards Spring Security has improved support substantially for adding security to your service layer methods. It provides support for JSR-250 annotation security as well as the framework's original @Secured annotation.

Source: Spring Security 3.1 Reference 2.4 Method Security
@Secured annotation allows you to put restrictions in your methods. For example, you can authorize a get() method to be accessible by all registered users. But for the edit() method, you can mark it be accessible by admins only.

We'll build first the Spring MVC part of our application, then add Spring Security. Our application has an admin and common pages. It also has a view to show all persons. Only admins can edit a person's record.

Let's declare our primary controller first.

MainController

This controller declares two mappings:
/main/common - any registered user can access this page
/main/admin - only admins can access this page
Each mapping will resolve to a specific JSP page. The common JSP page is accessible by everyone, while the admin page is accessible only by admins. Right now, everyone has access to these pages because we haven't enabled Spring Security yet.

Notice we've annotated each method with @Secured annotation. For the getAdminPage(), we put
@Secured("ROLE_ADMIN")
and for the getCommonPage(), we put
@Secured("ROLE_USER")
. Once we activated Spring Security these annotations will take effect.

Here are the JSP pages:

commonpage.jsp


adminpage.jsp


We've finished setting-up the primary controller and the associated JSP views. Now, we add the required XML configurations to enable Spring MVC and Spring Security at the same time.

We start by adding the web.xml:

web.xml

Notice the url-patterns for the DelegatingFilterProxy and DispatcherServlet. Spring Security is placed at the root-path
/*
Whereas, Spring MVC is placed at a sub-path
/krams/*

We also referenced two important XML configuration files:
spring-security.xml 
applicationContext.xml

spring-security.xml contains configuration related to Spring Security.

spring-security.xml

The elements are self-documenting. If you're using an IDE, like Eclipse or STS, try pointing your mouse to any of these elements and you will see a short description of the element.

Notice that the bulk of the security configuration is inside the http element. Here's what we observe:

1. We enabled @Secured annotation by adding the global-method-security tag:

2. We declared the denied page URL in the
access-denied-page="/krams/auth/denied"
3. We declared the login URL
login-page="/krams/auth/login"
4. We declared the login failure URL
authentication-failure-url="/krams/auth/login?error=true"
5. We declared the URL where the user will be redirected if he logs out
logout-success-url="/krams/auth/login"
6. We declared the logout URL
logout-url="/krams/auth/logout"
7. We declared a default authentication-manager that references an in-memory user-service

8. We declared an in-memory user-service:

This basically declares two users with corresponding passwords and authorities. This user-service is a good way to prototype and test a Spring Security application quickly.

9. We also declared an Md5 password encoder:

When a user enters his password, it's plain string. The password we have in our database (in this case, an in-memory lists) is Md5 encoded. In order for Spring to match the passwords, it's need to encode the plain string to Md5. Once it has been encoded, then it can compare passwords.

Compare this configuration with the one declared in Spring Security 3 - MVC: Using a Simple User-Service Tutorial. Our current configuration is missing the following declaration:

We don't need to declare those intercept-urls anymore because we've already annotated the methods that corresponds to those URLs. You can actually mix them if you need to.

Now we need to create a special controller that handles the login and logout requests.

LoginLogoutController

This controller declares two mappings:
/auth/login - shows the login page
/auth/denied - shows the denied access page
Each mapping will resolve to a specific JSP page.

Here are the JSP pages:

loginpage.jsp


deniedpage.jsp


That's it. We got a working Spring MVC 3 application that's secured by Spring Security. We've managed to build a simple and quick Spring Security configuration.

To access the common page, enter the following URL:
http://localhost:8080/spring-security-annotation-secured/krams/main/common
To access the admin page, enter the following URL:
http://localhost:8080/spring-security-annotation-secured/krams/main/admin
To login, enter the following URL:
http://localhost:8080/spring-security-annotation-secured/krams/auth/login
To logout, enter the following URL:
http://localhost:8080/spring-security-annotation-secured/krams/auth/logout
But there's more! Notice we annotated the methods from our controller. What will happen if we annotate the methods of our services instead?

To explore this inquiry, we will provide a hypothetical business scenario. Our client needs to view a list of persons. All registered users can view this list, but only admins can edit it.

We start by declaring a controller.

PersonController


In this controller we have three mappings:
/main - retrieve all persons
/main/edit/{id} - (GET) retrieve and edit a person by his id 
/main/edit/{id} - (POST) save a person based on his id
Notice we have two /main/edit/{id}. How does our controller know which one to call? The controller's @RequestMapping doesn't just rely on the mapping value but it also uses the method type. In our case, it's either POST or GET. The GET method is used when we retrieve a page; whereas, the POST method is used when we're submitting a form. For more info, please check the following blog from SpringSource Annotated Web MVC Controllers in Spring 2.5.

Also, we're using a special identifier in the mappings. We have declared a {id} in the path, and referenced that as @PathVariable in the method parameter. This is a URI template, one of the RESTful features of Spring 3 MVC.

What is a URI template?
A URI template is a URI-like string, containing one or more variable names. When these variables are substituted for values, the template becomes a URI. For more information, see the proposed RFC.

Source: REST in Spring 3: @MVC
For a thorough description of this subject, please visit the blog from SpringSourceREST in Spring 3: @MVC

It's worth noting that we did not annotate this controller with @Secured annotation.

Let's examine the associated JSP view for each mappings.

personspage.jsp

This is referenced by the mapping /persons.

To access the persons page, type the following URL in the browser:
http://localhost:8080/spring-security-annotation-secured/krams/persons

editpage.jsp

This is referenced by the mapping /persons/edit/{id} (GET)

To access the edit page, we need to manually type the following URL in the browser:
http://localhost:8080/spring-security-annotation-secured/krams/persons/edit/2
Just make sure to change the number to match the id that you want to edit.

Now let's define our service. Remember we referenced a PersonService in the PersonController.

PersonService

Pay attention to the methods. We've annotated the methods with @Secured.

getAll() and get() has been assigned with ROLE_USER. This means all registered users can access these methods.

edit() has been assigned with ROLE_ADMIN. This means only admins can access this method.

If you need to test these methods, try logging-in as john (password is admin) and as jane (password is user). Both users can view the list of persons. Both users can access the edit page. But only john can do a successful edit, while jane will get the following message
HTTP Status 405 - Request method 'POST not supported'

The best way to learn further is to try the actual application.

Download the project
You can access the project site at Google's Project Hosting at http://code.google.com/p/spring3-security-mvc-integration-tutorial/

You can download the project as a Maven build. Look for the spring-security-annotation-secured.zip in the Download sections.

You can run the project directly using an embedded server via Maven.
For Tomcat: mvn tomcat:run
For Jetty: mvn jetty:run
StumpleUpon DiggIt! Del.icio.us Blinklist Yahoo Furl Technorati Simpy Spurl Reddit Google I'm reading: Spring Security 3 - MVC: Using @Secured Annotation Tutorial ~ Twitter FaceBook

Subscribe by reader Subscribe by email Share